If you plan to upgrade your factory radio so as to reduce budget by yourself, it is suggested that you should find a correct installation instruction and follow it to deal with the car radio removal and installation. The following is a 2006 2007 2008 2009-2011 Honda Civic car radio installation instruction. If you own the same or similar dashboard, you can take this instruction as a reference. Wish it is helpful for you to some extent.

Before and during installation, you should notice:
1. Before connecting,please make sure the ignition is off to avoid short circuit.
2. Ensure connect the yellow and red power cable at last.
3. Ensure that all loose wires are isolated with electrical tape
4. Ensure don’t tangle the wire when tighten the moving parts(Such as seat rails).
5. Ensure that all ground is connected to the same place.
6. Using the improper fuse may cause damage of fire,so when replace the fuse, please consult the professional.
7. For your convenience, here’s there commended tools for removal and installation from Seicane, please check for more details: http://www.seicane.com/car-dvd-dismantling-device-srd-400
2006 2007 2008 2009-2011 Honda Civic car radio installation instruction
1. The original car radio.

2. Pry the cover of the slot below the CD player with a lever and remove it.

3. Remove two screws inside the slot with a ninety-degree screwdriver.

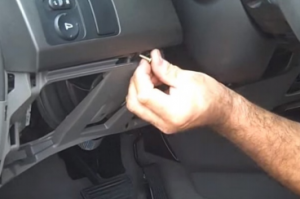
4. Pry the lower panel with a lever, loosen it with your hands at the same time, after that, remove the panel.

5. Remove one screw in the dash.

6. Remove the vent panel.

7. Unplug the connectors beneath the panel.

8. Pry the edges along the panel of the original radio, then remove it, after that, take the original car radio out of the dash.

9. Unplug the connectors at the back of the original radio.


10. Disconnect the antenna and the other connector on the other side of the original radio.


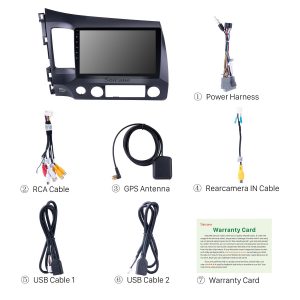
11. Check all the accessories for the new Seicane car stereo.

12. Connect the harnesses to the back of the new Seicane car stereo.

13. Connect the Seicane car stereo to your original car radio’s plugs.
14. Put the new Seicane car stereo into the dash.
15. Turn on the new Seicane car stereo and check whether the unit is working properly.
Wish you can get some help from the above installation guide. If you have any doubts, please don’t hesitate to contact your dealer, communicate with someone experienced or turn to a professional for help. Besides, if you still think the installation process is too complicated, you can directly arrange a professional from Seicane to help you. Anyway, before installation, you should select an ideal car radio for your beloved car. If you have no ideas, here I would like to recommend a remarkable 2006 2007 2008 2009-2011 Honda Civic car radio from Seicane to you. Here comes the link, please click:
Loaded with the advanced and stable Android 6.1 operation system and a powerful quad-core CPU processor, this car radio has greatly enhance its capabilities and performance. So with this car radio, you can gain a much smoother, faster and easier operation experience.
Under the guidance of the turn-by-turn directions and voice prompts provided by the worldwide real-time GPS navigation system of high accuracy, it will be much easier for you to locate where yo are currently and have the most suitable route option to reach your desired destinations.
Additionally, as long as you connect your Bluetooth-enabled mobile phone to this car radio, you are able to get access to Bluetooth hands-free phone calls as well as listen to streaming music for more convenience and enjoyment without taking your hands off the steering wheel.
If you like this unit, just add it to your shopping cart. Good luck!

