Specific installation steps for 2007 2008 2009 2010 Jeep Wrangler Unlimited DVD GPS navigation system

Before telling about specific installation steps for 2007 2008 2009 2010 Jeep Wrangler Unlimited DVD GPS

 navigation system,I’d like to show you a video first,which can help you know better about new stereo for

Jeep series.

You may have a general idea about this unit after watching this video.It seems to be more convenient when

our car has a radio like this,but you may worry about a question that you have owned one and how can you

get this new one.


In fact you can upgrade your car’s audio system by removing factory cd radio and installing the suitable

Jeep Wrangler Unlimited navigation system.It’s not a thing that can be finished only be technical person,

but also can be a self-done thing if you are willing to patiently learn how to achieve it.


At first,you need to choose a right dvd for your car,and you can do it with the help of a professional

worker.Next job is learn how to replace factory stereo with a new one.If want to know details of the

head unit for Jeep series,I advice you to visit some websites,for example:http://www.seicane.com/

2007-2008-2009-2010-jeep-wrangler-unlimited-dvd-bluetooth-stereo-replacement-hd-touch-screen-

3d-navigation-radio-tuner-tv-pop-1080p-c202.After figuring out these questions,next let’s begin our

installation.


 2007-2010 Jeep Wrangler Unlimited stereo removal and installation:

1.Original dashboard of Jeep Wrangler Unlimited

Original dashboard of Jeep Wrangler Unlimited


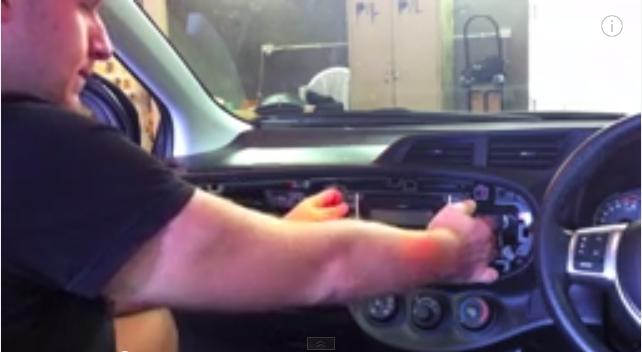
2.Prize the trim panel to release it with the help of pry tool

Prize the trim panel to release it with the help of pry tool


3.Remove trim panel and disconnect antennas behind it

Remove trim panel and disconnect antennas behind it


4.Remove 4 screws with a screw removal tool,two on each side

Remove 4 screws with a screw removal tool,two on each side


5.Gently take out factory stereo and disconnect cables back of it

Gently take out factory stereo and disconnect cables back of it


These 6 steps shows specific steps on stereo removal,it’s not complex to do it if you are patient enough.

After a small rest,then we go on the installation for Jeep Wrangler Unlimited.


6.Make antennas and cables connected step by step as next pictures show,and you should be very careful

when you are doing this for it will affect whole procedure

Make antennas and cables connected


Make antennas and cables connected


Make antennas and cables connected
Make antennas and cables connect


7.After ensure your connection is right,install the new unit in right position,and you’d better have a tidy

for the cables before installation to make installation more easily

install the new unit in right position


8.Turn on new stereo and check if your work is right.If it shows yes, then you can fix 4 screws beside

new radio and cover trim panel on the surface of car radio

The aftermarket car stereo DVD GPS nav system of 2007 2008 2009 2010 Jeep Wrangler Unlimited


Precautions after installation:

1.Please use a dried and clean cloth to wipe the touch screen,no other washing products or liquid to do it

2.Do not stare at your new machine especially when you are driving on a crowd road

3.When your car is driving on a abnormal day,for example a rainy day,you should pay more attention on

your head unit for moisture may gather on it;In addition

4.If you have used the aftermarket stereo for a long time and its temperature is over 70 degrees,you’d

better turn it off to protect your sound system


2011 2012 2013 Opel Astra Navigation DVD Bluetooth installation

When you see next stereo which is specially for 2011 2012 2013 Opel Astra, you may feel confused for there

is some difference between this one and original one of car on appearance and functions.


Car head unit after installation,DVD GPS navigation system with bluetooth music of 2011 2012 2013 Opel Astra


Original car’s screen is only used for showing something,while this one’s screen is touch screen that you can

also operate on it with your hand or touch screen pen.


A lot of people have the idea to install a dvd gps for his Opel Astra to catch up with society trend and enjoy

themselves better during driving at the same time.And this is same to aim of this article,because you will see

detailed steps on 2011 2012 2013 Opel Astra Navigation DVD Bluetooth installation today.


Here is a video which will show you main features of the aftermarket stereo of Opel Astra.


Before you begin radio installation,you need to mind a series of things to make your work more smooth.


Precautions about installation:

1.Please remember to turn off your radio and other equipment,and make negative battery cable disconnected

to avoid unnecessary damage to people

2.In addition,when you are doing removal affairs,please place original CD player and removed screws in safe

places to ensure that you can find needed things after you have installed unit in at later time


Next we will talk about how to remove factory stereo and install Opel Astra Navigation system.It’s usual for you

to find some difference between your car radio appearance with the following one,don’t worry and you can take

it as reference because stereos for a series of cars are substantially uniform.


2011 2012 2013 Opel Astra radio removal:

1.Take out all things in this space

Take out all things in this space


2.Lever its surface file panel and use a pry tool to remove it(you may remove it absolutely after next step)

Lever its surface file panel and use a pry tool to remove it


3.Remove this screw and the other corresponding one

Remove this screw and the other corresponding one


4.Loosen this side big trim panel and remove it

Loosen this side big trim panel and remove it


5.Open up two small panels and remove 4 screws under them

Open up two small panels and remove 4 screws under them


6.Take lower notch out and unplug cables at the back of it

Take lower notch out


unplug cables at the back of it


7.Gently get out factory stereo and disconnect cables behind it,you can use a pry tool to remove some tight

ones

Gently get out factory stereo and disconnect cables behind it


8.Pry upper control buttons’s edges around panel and remove it

Pry upper control buttons's edges around panel and remove it
Pry upper control buttons’s edges around panel and remove it


2011 2012 2013 Opel Astra gps navigation installation:

9.Install this panel on new unit,and same to lower control button

Install this panel on new unit


10.Make right cables connection,which is shown in following pictures:

Make right cables connection


Make right cables connection 2


Make right cables connection 3


Make right cables connection 4


11.After that,install new unit into the right place and reinstall other things back to car

reinstall the big trim panel and other panels to the car


When you have finished all these, turn on your new radio and check if it’s installed right and whether functions

can operate.If you want to know better about new radio,you’d better seek some information from the Internet,

for example: http://www.seicane.com/oem-aftermarket-car-radio-upgrade-sat-navi-system-for-opel-astra-with

-fm-am-3g-wifi-3-zone-pop-built-in-gps-dvd-bluetooth-ipod-rearview-c072.


Though this kind of installation is a little more complex than other ones on connecting cables,I have confidence that most of you will make it clear with the help of above 12 specific steps and clear images.


How to upgrade 2013 2014 2015 Ford F150 radio stereo

Do you want to install a new stereo in your 2013 2014 2015 Ford F150?I think most of you have this kind of need but not very sure about what to do with it.

In fact it won’t be complex if you know how to upgrade 2013 2014 2015 Ford F150 radio stereo,then it means that you can do it yourself without asking a installer to do it.It can also save some pocket money after all.

Before showing you detailed installation steps,I have a picture for you:it’s head unit after installation,radio gps navigation system with 3G WIFI of 2013 2014 2015 Ford F150.

head unit after installation,radio gps navigation system with 3G WIFI of 2013 2014 2015 Ford F150

Through viewing this picture we can find that there is some difference from other stereos:

First of most stereos are rectangles while all the exterior of this Ford F150 radio turns to be special shape;In addition,it has both touch screen and button controls to operate it.Therefore this radio is not a usual radio but a practical one.

In order to avoid unnecessary damage to car audio system,I think you need to know how to operate that new audio,and you can have a view at next video before installation:

After this,you may have grasped the general idea about it and next prepare some tools include screwdriver,panel removal tool and so on.

2013 2014 2015 Ford F150 original radio removal:

1.Remove the rubber pad which is at the top of trim panel

Remove the rubber pad which is at the top of trim panel


2.Remove these exposed 2 screws

Remove these exposed 2 screws


3.Fasten and pull side panels including the a/c vents off the radio trim panel.

Please note that it is not necessary to remove the panels completely

Fasten and pull side panels including the a/c vents off the radio trim panel


4.Loosen and remove trim panel of the unit

Loosen and remove trim panel of the unit


5.Make all molex plugs disconnected

Make all molex plugs disconnected


6.Get down the 4 screws to remove the factory radio

Get down the 4 screws to remove the factory radio


7.Remove car radio and unplug connectors behind it

Remove car radio
Remove car radio


unplug connectors behind it


Now original stereo radio is removed with the help of pry tool,and you can see whether the space is just for your new bought unit.Why?For you need to ensure that it can mounted into your car,then you can go on doing following things.

2013 2014 2015 Ford F150 aftermarket radio installation:

Honestly speaking,installing steps should be easier than removing affairs except cables connection,which may be the most important thing,you should do it very carefully according to installation instructions.

During cables connection,you should make sure each connector is connected to which one,about this you can try to find out corresponding wiring diagram and watch how their interfaces look like.Believe yourself and be careful,it won’t be hard for you.

After cables connection,gently put your new unit in right space,don’t eager to finish all process,you can turn on new radio first and have a check for it.If everything goes well,make all removed equipment back to your car and you can enjoy your better quality audio system.

Wish you good luck!If you have succeed achieving it,but you still have doubts about this unit,then you can go to some websites to search things that you need,for example:http://www.seicane.com/head-unit-car-stereo-sat-navi-multimedia-player-for-2013-ford-f150-with-gps-radio-dvd-bluetooth-3g-wifi-support-swc-3-zone-pop-c267.It will help you operate it fully and better.


Specific installation steps for 2012 2013 2014 Chevrolet S10 navigation system support BT pairing rearview camera

If you are a owner of 2012 2013 2014 Chevrolet S10,I think you should be someone who are interested in upgrading your car stereos.

Actually the operating system of most car stereos are same,so a new stereo may can installed in several cars.A car also has some choices.

Let’s have a look at following image first :it’s head unit after upgrade,DVD GPS navigation system of 2012 2013 2014 Chevrolet S10.

Then you can decide whether to learn specific installation steps for 2012 2013 2014 Chevrolet S10 navigation system support BT pairing rearview camera.

Head unit after upgrade,DVD GPS navigation system of 2012 2013 2014 Chevrolet S10

This unit can be installed in your car if it belongs to what is mentioned in the picture.In addition,maybe this stereo can be installed into not only one type car,what can we know whether it’s suitable?All right,you can have a careful watch at its trim panel and make a comparison between factory one and this one,if they are same then the answer is yes.

Some of you may think installing Chevrolet S10 navigation radio in your car by yourself is not possible.However it’s very possible because many car owners who are not professional have achieved this goal by himself,of course it’s under the condition that him or her has made enough preparations for it,such as searching related information and ask workers of this market to get problems solved.Next comes to Chevrolet S10 radio installation.

2012 2013 2014 Chevrolet S10 stereo removal:

1.Gently lever the upper trim housing panel from the dash with a removal tool

Gently lever the upper trim housing panel from the dash with a removal tool


2.Lever edges of side panel,release and reposition the shifter

Fasten and reposition the shifter


3.Make out 2 screws(this screw and the other corresponding one) from the storage pocket,remove car storage

Make out 2 screws
Make out 2 screws


remove car storage
remove car storage


4.Make out 4 screws which are on the accessorv control panel

Make out 4 screws which are on the accessorv control panel


Make out 4 screws which are on the accessorv control panel


5.When you remove this very tough panel you should be patient and the clips will loosen.,then let panel hang to side

remove this very tough panel


6.Make out 2 screws from radio control panel,unplug the radio control panel

Make out 2 screws from radio control panel


7.Take out the really strange blue clip absolutely before removing the other connector,and remove the latter one

Take out the really strange blue clip absolutely


8.Get out 2 screws which are on the radio chassis,and remove the other 2 screws which are near the top of the stereo,in order to fasten the screen

Get out 2 screws which are on the radio chassis


9.Make screen out by pulling,and get behind clip out

Make screen out
Make screen out


10.There are still 2 screws on stereo,remove them from car head unit


remove them from car head unit


11.Take stereo and connectors out

Take stereo and connectors out


2012 2013 2014 Chevrolet S10 DVD nav system installation:

12.Read installation instructions that within you new bought stereo,precisely make cables connection between new stereo with car’

13.After correct connection,install your new unit into your car and turn on it to test whether your actions are all right

13.Fix 2 screws to the stereo and install the dvd player in position

14.Make 2 screws back to the place near top of the stereo,and 2 screws to radio chassis

15.Make other parts back to original place and don’t forget to firm their screws back to them to fix corresponding machine

This is whole process for the installation,and you will succeed only if you can act as above steps carefully.

Please notice that keeping you safe is the most important,if you still account some problems that is difficult to deal with,you can ask someone who knows better for help,wish you good luck.

And you can get more information about new unit from next website: http://www.seicane.com/car-dvd-radio-player-sat-navi-system-for-chevrolet-s10-support-3g-wifi-dvr-video-recording-with-gps-radio-bluetooth-3d-map-file-management-c203-1.


How to install 2009 2010 2011 Mazda CX-7 navigation audio system with DVD player 3G WIFI


Firstly,you can have a look at following picture first: head unit after installation,dvd GPS navigation system support DVR SWC of 2009 2010 2011 Mazda CX-7.

Head unit after installation,dvd GPS navigation system support DVR SWC of 2009 2010 2011 Mazda CX-7

If you are one owner of Mazda CX-7 for 2009 2010 2011 and you are still using oem factory radio,then you can find that the trim panel of it is same with yours.It means that this unit fits your car if you are going to install a new stereo into it.

And this essay is just going to show you detailed steps on how to install 2009 2010 2011 Mazda CX-7 navigation audio system with DVD player 3G WIFI?Maybe most of you are more likely to make things convenient.But I guess you have not known much about it.

Don’t worry,because the whole process may only take about few minutes to finish it for professional person and it won’t be much difference when you are willing to install the unit by yourself,and you’d better do it according to right installation instructions.

You may need some tools for the mount during this process, such as a screwdriver, a lever and so on.The next part will be the installation operations for Mazda CX-7 navigation system.In order to make sure your safety,please remember to apply the parking brake and remove negative cable on car battery before you begin your actions.

Precautions about the installation:

1.Please read installation instructions from the dealer carefully if you have it

2.Please pay more attention on cables connection between the new unit and car,this is very important to your work

2009 2010 2011 Mazda CX-7 factory radio removal:

1.Use a firm lever to pry edges of trim panel

Use a firm lever to pry edges of trim panel


The same to lower part


2.Remove trim panel after it is loosened totally

Remove trim panel after it is loosened totally


3.Take down these four screws which lay two on each side with a screwdriver

Take down these four screws


4.Remove original CD player and disconnect cables that connected them

Remove original CD player


disconnect cables that connected them


5.Get down four screws,two as the picture show,and other two on the other side

Get down four screws


6.After that remove these two screws and the same to the cable

remove these two screws


remove the cable
remove the cable


7.Then you can remove the panel off white part

remove the panel off white part


2009 2010 2011 Mazda CX-7 aftermarket stereo navigation system installation:

8.Connect your new stereo with car’s dashboard by plugging cables correctly and firming screws on it

9.Sort cables and the dvd player in,fix four screws that are set aside before

10.Cover your radio with other removed parts and turn on new radio to check whether your operations are all right

If you want to know more about this new unit,I suggest you to search for some information from related websites,for example:http://www.seicane.com/lcd-touch-screen-gps-radio-replacement-for-2009-2010-2011-mazda-cx-7-with-dvd-player-3g-wifi-bluetooth-music-dvr-steering-wheel-control-hd-1080p-ipod-iphone-aux-mp3-c097 .

The best way to install the head unit yourself is do it according to right guidance in order to ensure that your radio nav system can be used for longer time.This multimedia car stereo will surely make your usual life more colorful with those new functions and good maintain.

It’s possible that you meet some problems that can’t solve by yourself,you can ask someone who are professional in this field and wish you successful work.


Specific installation steps for 2009 Hyundai I20 navigation dvd with bluetooth 3G WIFI

In modern society car stereos are upgrading with a very fast speed to satisfy people’s higher and higher demands for it.Thus designers for Hyundai I20 try to manufacture more technical car stereos to have a good market.

At the same time,many owners of Hyundai I20 are willing to install a new head unit into their cars.But the question is to knwo the specific installation steps for 2009 Hyundai I20 navigation dvd with bluetooth 3G WIFI when you plan to do it yourself.

Before we talk about the details,let’s have a look at a picture first,which is head unit after installation,aftermarket GPS dvd navigation system of 2009 Hyundai I20.

Head unit after installation,aftermarket GPS dvd navigation system of 2009 Hyundai I20

You may have seen this unit before but don’t know whether it’s suitable for your car,actually there is an easy way to make a judgement.That is to see if original radio and new one’s trim panels are same.And this is the specialized Hyundai I20 navigation dvd that you needn’t to bother which one to choose.

Precautions before installation:

1.Please remember to finish your parking series before your installation

2.Please remember to disconnect the negative battery cable before starting stereo removal

3.Check out your factory radio unit include some related objects to car audio,and see whether everything is ok before your installation

After you have taken these notes in mind,next will comes to main part of this article.

2009 Hyundai I20 original audio system removal and navigation dvd installation:

1.Pry the lower part dashboard and increase one on right direction step by step with the help of levers,then continue to right side until you can fasten the dashboard

Use a lever to pry the lower part of dashboard


increase one on its right side step by step


continue by right side


2.Gently take out right-side dashboard,be careful and slow because the dashboard for it is tighter than usual one

Gently take out right-side dashboard


3.After you have totally removed dashboard from the unit,you can easily remove the remaining part

remove the remaining part of the unit


4.This is  the inside appearance of  dashboard after removal

inside appearance of  dashboard after removal
inside appearance of dashboard after removal


4.Disconnect all cables behind the radio

Disconnect all cables behind the radio


5.Make out these four screws,each side has two ones

Make out these four screws


6.Gently take factory CD player out

Gently take factory CD player out


The removal process has been finished,the next step comes to installation work for Hyundai I20  aftermarket radio:

7.Remove the trim panel off the unit gently after you have removed screws on it,and then install new radio to right space

8.Firm screws and screw them beside the cd radio to fix it,make dashboard back to your car

If you are going to start your installation work after you know right steps,then you can ask a friend beside you to give you a hand,such as passing you a tool or make sure your safety during this process.Please do not do self-installation,service or maintain when you have no experience on it,it can be very dangerous.

Most of you should know little about usage of new unit,then you can get more information from related websites,for example: http://www.seicane.com/2009-hyundai-i20-autoradio-gps-sound-system-dvd-cd-player-bluetooth-music-tv-tuner-wifi-3g-aux-pop-reverse-camera-usb-sd-ipod-iphone-dvr-hd-1080p-video-c030 .

This new head unit for 2009 Hyundai I20 has increased some new functions,which brings us more convenience and entertainments.For example,the GPS navigation system can show 3D and google map on the screen when you entered a destination on it,then detailed map will be shown on the screen,it also has voice navigation,you will never get lost with this function.


How to install 2010 Toyota Raze navigation system with radio IPod 3-zone POP

Are you familiar with this image:navigation dvd car stereo of 2010 Toyota Raze?

navigation dvd car stereo of 2010 Toyota Raze

Some of you may have seen this stereo when you are shopping in the car market,you want to take one home but you have no idea how to install it in your 2010 Toyota Raze.Or in other words,you don’t know how to remove original radio first.Doesn’t matter,today I will show you 10 steps on how to install 2010 Toyota Raze navigation system with radio IPod 3-zone POP.

It’s very easy to confirm information of cars like mode,size, years and so on,but if it’s about the detailed steps to mount a car audio system?Maybe very few people knows.

Before you upgrade your car’s stereo audio,you should ensure that the instructions for it are exactly right.And the general process can be like this:

1.Choose one unit that can be installed in your car.

2.Trying to collect precise installation guide from the Internet,TV,magazine or other media routes.

3.Chatting with workers who serves in this market and tell them what your doubt is about is one of ways that is normally used.And you may visit this website to get what you want by scanning and talking with them:http:http://www.seicane.com/8-inch-2010-toyota-raze-autoradio-gps-head-unit-3g-wifi-cd-dvd-player-dvr-bluetooth-music-tv-tuner-aux-steering-wheel-control-ipod-iphone-backup-camera-mp3-pop-c084.

If you hope to make your Toyota Raze cd player removal and dvd player installation more precise and safer, here are some advices about the installation and usage of the unit:

Precautions about the installation:

Please use your finger or touch screen pen to gently operate unit, do not use other objects include your fingers, if not it will cause damage to the screen;

Don’t do self-service,maintenance or install the unit please when you have no experience or knowledge about it,in case of the power is on.

2010 Toyota Raze factory stereo removal:

1.Before you start installation, remove negative terminal of battery

2.Unclip side panels from lower center console(beside shifter) with a panel removal tool

Unclip side panels from lower center console(beside shifter) with a panel removal tool


3.Use  remove the plastic piece that’s contains the shifter override with a small flat blade screwdriver

Use  remove the plastic piece that's contains the shifter override with a small flat blade screwdriver
Use remove the plastic piece that’s contains the shifter override with a small flat blade screwdriver


4.Insert key into override move in gear and get out shift benzal piece

Insert key into override move in gear and get out shift benzal piece


4.Remove 2 screws as the picture show

Remove 2 screws as the picture show


5.Take the below small dashboard out

Take the below small dashboard out


6.Use a panel removal tool to unclip side panels from radio

Use a panel removal tool to unclip side panels from radio


7.Take out air vent and pull out hazard switch

Take out air vent
Take out air vent


pull out hazard switch


8.This is 10mm hex head screws from stereo

This is 10mm hex head screws from stereo


9.Unclip connectors of the stereo and remove

Unclip connectors of the stereo and remove


2010 Toyota Raze aftermarket navigation installation:

10.Make connections on all the cables correctly and install the dvd navigation head unit in your car

Connecting all cables of Toyota Raze navigation installation is a work that you should be more careful because it is more complex than other steps itself and there are much fine wires.If you are not very sure about it,I suggest you to do it according to corresponding instructions,check it once again after you have finished it.Or you can ask someone to help you,who is professional at it and can make your work more perfect.

And I wrote another article which is about Toyota Verso radio

,hope you can get something that benefits you from it.


Easy installation steps for 2012 Toyota Hilux GPS dvd support BT 1080P Ipod

First of all,let’s have a look at following picture: car stereo autoradio after installation,GPS dvd sat nav system of 2012 Toyota Hilux.

Car stereo autoradio after installation,GPS dvd sat nav system of 2012 Toyota Hilux
Car stereo autoradio after installation,GPS dvd sat nav system of 2012 Toyota Hilu


If you would like to upgrade your car’s audio system,go to car market and willing to choose a fashionable Toyota Hilux GPS  dvd.Please mind that the stereo must be suitable for your car,so you need to look carefully the radio’s trim panel to see if it’s same to your original one’s.


Next,you need to have a check for your car and make sure that you have turned off all car series and remember to unplug negative power cable before installation.


After doing all these,you need to learn how to do it if you are going to achieve it yourself.Don’t worry,it doesn’t need much skills but need you to be careful and I will show you easy installation steps for 2012 Toyota Hilux GPS dvd support BT 1080P Ipod.


2012 Toyota Hilux original head unit removal:

1.Turn off power switches as the picture show and remove three small covers in lower place

Turn off power switches
remove three small covers in lower place

2.Take out the middle screw

Take out the middle screw


3.Push in buttons a little  on left and right side

Push in buttons a little  on left and right side
Push in buttons a little on left and right side


4.Take trim panel off the radio

Take trim panel off the radio


5.Disconnect cable behind it and take out two screws with a screwdriver

Disconnect cable behind it
       Disconnect cable behind it 
take out two screws with a screwdriver
take out two screws with a screwdriv 


6.The cd radio after removal as the picture show

the dashboard after removal as the picture show


7.Release four screws that lay on two sides,remove them

Release four screws that lay on two sides,remove them


8.Take out  the CD player after four long screws have been removed

Take out  the CD player after four long screws have been removed
Take out the CD player after four long screws have been removed


9.Disconnect wires behind the CD player

Disconnect wires behind the CD player


2012 Toyota Hilux GPS dvd installation:

When you have finished removing factory CD radio successfully with the help of removal guide,you can make a comparison between above removed one with yours,in order to make sure that you have done right disconnection.

As for the next work that is to install a new radio,you can read the installation instructions which is within your bought radio.There should be detailed introduction on how to make connection on all cables.

And I advise you to ask someone who is more professional to do it,after all it’s a little complex and matters much.If you feel confused or feel difficulty dealing with something,you can visit a website to have a detailed talk with workers there,for example: http://www.seicane.com/all-in-one-2012-toyota-hilux-dvd-gps-audio-system-radio-rds-tv-tuner-bluetooth-music-3g-wifi-ipod-1080p-auto-a-v-in-out-dvr-aux-pop-backup-camera-usb-sd-c143.


In fact car stereo upgrade is almost same in a large proportion,and it’s also normal to find some difference,you will solve it well only if you have made adequate preparations before you start up.

Some Precautions after installation:

1.If you want to clean the touch screen,please use a piece of clean and dry cloth and gently wipe it,do not use any liquid to wash it

2.Please do not stare at the machine especially when you are driving on a complex road,the video can bring you entertainments but not attentions or energy,so you’d better enjoy it only when you are free

3.Please pay more attention to the GPS dvd when your car is driving on a rainy day,for moisture may gather on it and cause damage to the system


Update a removal experience about 2007-2017 TOYOTA LAND CRUISER Car GPS Navigation System

Update a removal experience about 2007-2017 TOYOTA LAND CRUISER Car GPS Navigation System 

Generally if people do not satisfy their car radios,mostly because the car factory head unit is lack of functions they need. To purchase a new advanced and modern car radio with expected foundations to replace the original one is kind of prior selection. That is the reason to write down the following article. As well you can ask a dealer or professional guy if you can not remove successfully by following the steps below. Good luck.

First of all, please note:

  1. Please park the car in safe area and remove the negative cable on the vehicle battery before the removal
  2. A lever and a screwdriver need to be prepared before the installation.

2007-2017 TOYOTA LAND CRUISER Car Stereo Removal

1.Take out the two blots that distributed on both sides of handbrake

2.Remove the screws with screws driver.

3.Take the left & right loosed dashboard out after the bolts are removed

4.Disconnect the cables on back between the left & right loosed dashboard

5.Take the screw out with removing tool.

6.Get out the screws which holding the CD Player on the dash.

7.Pull CD player off the unit

8.Unplug the cables behind carefully. (Wiring Diagram as reference)

Wish 2007-2017 TOYOTA LAND CRUISER car DVD Player installation and removal article is just what you need now.You can make your car more attractive with the touchable and multifunctional car radio for 2007-2017 TOYOTA LAND CRUISER from Seicane. If you have not shopped any good, please click the link below to get more information. Perhaps it would fit your car.

https://www.seicane.com/oem-android-dvd-player-for-2004-2016-toyota-land-cruiser-lc200-radio-replacement-with-touch-screen-gps-car-stereo-bluetooth-music-mirror-link-obd2-3g-wifi-video-backup-camera-s169009


This 2007-2017 Toyota LAND CRUISER Car GPS Navigation  comes with the latest Android Radio, RAM 4GB \ ROM 64GB \ CPU 8-core \ Built-in Carplay \ 2.5D IPS Screen, Support RDS, SWC, XM radio APP etc. You can still keep the steering wheel control working after the installation of this fantastic stereo. Hopefully you shall a awesome experience with the new unit.

How to upgrade 2013 2014 Toyota Yaris stereo to 2 din radio dvd gps nav system

If you are going to upgrade your stereo of Toyota Yaris,then you can have a view at next image,it is new unit after upgrade,audio  stereo GPS of 2013 2014 Toyota Yaris,which support TV Tuner Bluetooth Music 3G Wifi Rearview Camera.

new unit after upgrade,audio  stereo GPS of 2013 2014 Toyota Yaris
new unit after upgrade,audio stereo GPS of 2013 2014 Toyota Yaris

In recent life most of the factory car stereos can hardly meet drivers’ needs,so the producers need to make improvements on the head unit include its appearance and features.

Before you can install it you need to remove original one first,you can ask a skilled person to do it,or you can also achieve it by yourself,facts shows it’s possible.So how to upgrade 2013 2014 Toyota Yaris stereo to 2 din radio dvd gps nav system?

Yes,a lot of car drivers have achieved this goal,but it doesn’t mean you can do it as you want.And before you begin any work,I advise you to do some preparations for this activity.

At first,you should find the right Toyota Yaris stereo for your car,next you need to know detailed instructions about the installation and know the unit as much as possible.Maybe you can visit some related websites,for example:http://www.seicane.com/oem-radio-navigation-system-for-2013-2014-toyota-yaris-with-dvd-cd-player-tv-tuner-bluetooth-music-3g-wifi-rearview-camera-c317.

There are also some notes for you to notice,you should do according to them,or it may cause damage to car or even people.For absolute security,you’d better let someone else who are professional to do.

Precautions before installation:

1.Please park your car in a safe place to make it smooth and before you turn off all car series,you can have a check to make sure everything is ok

2.Please remember to unplug negative power cable to avoid any danger during next process

3.Ensure that all fastened wires are isolated with electrical tape

2013 2014 Toyota Yaris radio removal and installation:

2013 2014 Toyota Yaris original stereo removal and new stereo installation:

1. Pry trim panel of the radio


Pry trim panel of the radio


2.Make four mounting screws out

Make four mounting screws out


3.Gently take out the CD player

Gently take out the CD player


4.Get these four screws out

Get these four screws out


5.Take out your hot new stereo unit

Take out your hot new stereo unit


6.Have a check for QA’s seals

Have a check for QA's seals
Have a check for QA’s seals


7.Get all transport screws out

Get all transport screws out


8.Make your accessories inserted in

Make your accessories inserted in


9.Get trim panels removed to install reversing cam

Get trim panels removed to install reversing cam


10.Have a test for that camera prior to drilling

Have a test for that camera prior to drilling


11. Fix the screws that were removed from the original CD player to new unit

Fix the screws that were removed from the original CD player to new unit


12.Install car other parts to their primary place

Install car other parts to their primary place


This stereo’s procedure may be a little more complex than other ones on connecting cables,but I believe that most of you have obtained it well with above 12 detailed steps and intuitive images.But you also need to know more specific things about this new unit to make better use of this new functional stereo.

Please be gentle and soft to your audio system when you are doing something with panels or other parts to avoid unnecessary destroy to your beloved car.The same to the time when you are removing original cd stereo and do cables disconnection.

Connecting cables is a very significant work during whole process.If you are not sure,you’d better ask other people to do this connection,in all words,take it serious when doing every operation.