Apparently, buying a new car stereo for Toyota owners can bring much more benefits than they can imagine not only because of its fantastic looks, but also can have expansion options such as smartphone integration, navigation, and additional camera etc. Therefore, more and more people choose to buy it and some of them even install it by themselves. But not all of them have an overview of a basic car radio installation, this article below will illustrate the specific installation guide of 2008-2015 Toyota Land Cruiser(High Version)required for your vehicle. You can take it as a refer and hope you can get useful advice from it.

Before installation, you should pay attention to some important tips. First of all, you can disconnect the power and prepare some tools such as lever before the removal and the installation. Secondly, you should keep all the separate parts from the car and take great care of the dashboard to avoid scratching it during its detachment and installation.
Last but not least, you should keep handy any parts from the car and make use of all the original screws from the car as much as possible so that each related part of the unit can be fixed securely.
2008-2015 Toyota Land Cruiser (High Version) Radio Installation Guide
1.Remove the fixed panel on the left side under the radio system

2.Unscrew the screw and remove the trim frame on the left side of the radio system

3.Remove the fixed panel on the right side under the radio system

4.Unscrew the screw and remove the trim frame on the right side of the radio system

5.Pry to remove the A/C vents, take down the vents and unplug the connectors.

6.Pry to remove the plastic panel on the top of the radio system.

7.Remove four screws that fix the screen unit

8.Take down the screen and disconnect its plugs

9.Remove four screws that fix the CD unit

10.Take down the CD unit and unplug the connectors

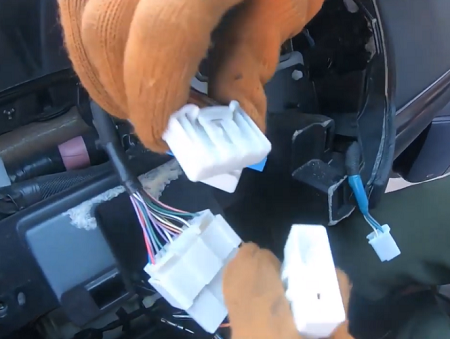
11.Correspondingly connect the cables of the new car radio to the car plugs.
12.Connect the new radio system and install it back to the dashboard.

13.Install back the trim frames, fixed panels, A/C vents and plastic panel.

14.Turn on the car to check whether the upgraded radio system functions normally

Whatever your level of experience, you can start to try under the guidance of this article and you’ll save money when you install it yourself. But if you still have some questions during the process, you can ask for a professional technician for help as they will give your the best service as much as possible. And you can also use some modern tools such as facebook or the related website to search your answers. Here I would like to share a product of 2008-2015 Toyota Land Cruiser(High Version)from Seicane. You can find the audio gear that fits your car and also take it as a tool as it is covered with a wide range of car stereo equipment.
This Touch Screen is integrated with high-sensitive radio IC with good reception, supports worldwide analogradio channels reception, RDS standard included for some European countries where with RDS radio signal. Built-in 16 segment EQ adjustment DSP tuning, it supports ahd signal input and AV dual video output, which means you can get audio enjoyment as well as visual one.
Come and visit more detailed installation here, you can get most from your DIY Try now!
