The Direct Instruction on a 1998-2006 BMW M3 Car Stereo with DVD Player Bluetooth GPS Navigation System

1998-2006 BMW M3 Car Stereo after installation

As a car owner of a 1998-2006 BMW M3, if your original car radio becomes too outdated after a long-term use, you may want to replace it with a brand new car stereo. A qualified car stereo can support a lot of practical and entertainment features which can enrich your in-car life and make it be filled in convenience and entertainment. With a correct installation instruction, you can also try to finish the installation process on your own. Here is a detailed 1998-2006 BMW M3 car stereo installation instruction for your reference. Wish it is helpful for you.

1998-2006 BMW M3 Car Stereo after installation

Some tips before the installation:

1.Please disconnect the power before the installation.

2.Please prepare a lever and a screwdriver before the removal and the installation.

3.Please keep all the separate parts from the car. Please take great care of the dashboard to avoid scratching it during its detachment and installation. Please keep handy any parts from the car and make use of all the original screws from the car as much as possible. so each related part of the unit can be fixed securely.

4.For your convenience, here’s the recommended tools for removal and installation from Seicane, please check for more details: http://www.seicane.com/car-dvd-dismantling-device-srd-400

1998-2006 BMW M3 car stereo installation instruction

1. The original car radio.

The original car radio

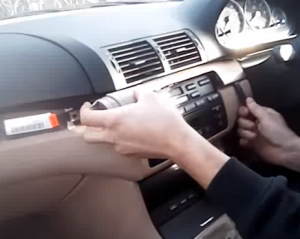
2. Remove the surrounding trim panel with a plastic removal tool.

Remove the surrounding trim panel with a plastic removal tool
2-1
2-1
2-2
2-2

3. Remove two screws fixed the radio on the dashboard.

Remove two screws fixed the radio on the dashboard
3-1
3-1

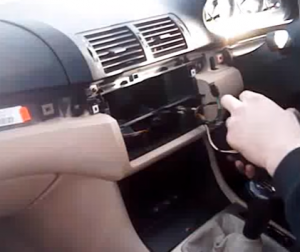
4. Gently pull out the original car radio.

Gently pull out the original car radio

5. Unplug the connectors and cables at the back of the radio.

Unplug the connectors and cables at the back of the radio

6. Remove the A/C control and unplug the connectors.

Remove the A/C control and unplug the connectors
6-1
6-1

7. Remove two screws holding the heat vent.

Remove two screws holding the heat vent
7-1
7-1

8. Remove screws so as to remove radio frame.

Remove screws so as to remove radio frame

9. Check all the accessories for the new Seicane car stereo.

Check all the accessories for the new Seicane car stereo

10. Connect the harnesses to the back of the new Seicane car stereo.

Connect the harnesses to the back of the new Seicane car stereo

11. Connect the Seicane car stereo to your original radio’s plugs.

12. Turn on the new Seicane car stereo to have a careful check if everything works well. If it doesn’t, please check whether all the cables are connected correctly.

13. Put the new Seicane car stereo into the dash.

14. Put everything into their original place. All the installation is done.


If you cannot fully make clear every detailed step, then you can consult your dealer, communicate with someone experienced or seek help from a professional. Or you can straightly arrange a technician to help install the car stereo. But if you haven’t got a suitable car stereo, I’d like to share a great car stereo from Seicane which is for a 1998-2006 BMW M3. Here comes the related link, please click:

https://www.seicane.com/8-core-android-1998-2006-bmw-m3-radio-upgrade-with-1024-600-multi-touch-capacitive-screen-gps-bluetooth-stereo-3g-wifi-cd-dvd-player-obd2-mirror-link-steering-wheel-control-reverse-camera-hd-1080p-s12746e

Integrated with the most stable Android 6.0 operation system and a powerful 8-core 1.5 GHz RK-PX5 A53 processor, this great car stereo also comes with a wide range of comprehensive features to meet your various needs in car.

When you are in an unfamiliar place, as long as you turn on the 3D GPS function of high accuracy, you can locate where you are and navigate to your desired destinations according to turn-by-turn directions and voice prompts. While navigating, you can also freely listen to beautiful music from radio, AV, DVD, TV etc.

Thanks to the wireless Bluetooth technology, you can be provided with a journey filled in safety, convenience and enjoyment. You can pair your Bluetooth-enabled mobile phone with this car stereo so as to make, receive, reject and mute hands-free calls as well as stream music from your phone music playlists.

Wish you enjoy your journey accompanied by this car stereo. Good luck to you!

How to Upgrade a 2000-2005 Mercedes Benz C Class W203 C180 C200 C220 C230 C240 C270 C280 Car Radio with DVD Player GPS Navigation System

2000-2005 Mercedes Benz C Class W203 C180 C200 C220 C230 C240 C270 C280 Car Radio after installation

As a car owner, when you are considering replacing your factory radio with a brand new car radio, you may wonder what a new car radio may bring to you. As a matter of fact, a modern new car radio can not only meet almost all your practical and entertainment needs in a car but also improve your driving experience to next level. If you have some related installation experience, you can consider installing it by yourself. If you own a 2000-2005 Mercedes Benz C Class W203 C180 C200 C220 C230 C240 C270 C280, you can refer to the following detailed installation guide.

2000-2005 Mercedes Benz C Class W203 C180 C200 C220 C230 C240 C270 C280 Car Radio after installation

Precautions for this installation:

1.Before you start up any work, park your car well and unplug the negative power cable to avoid any danger.

2.Please make sure that all fastened wires are isolated with electrical tape.

3.Please make sure the ignition is off to avoid short circuit.

4.For your convenience, here’s the recommended tools for removal and installation from Seicane, please check for more details: http://www.seicane.com/car-dvd-dismantling-device-srd-400

2000-2005 Mercedes Benz C Class W203 C180 C200 C220 C230 C240 C270 C280 car radio installation guide

1. The original car radio.

The original car radio

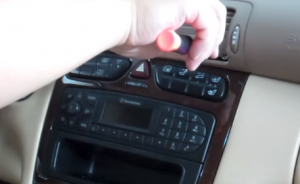
2. Use a special plastic tool to remove the trim bazel.

Use a special plastic tool to remove the trim bazel
2-1
2-1

3. Use a plastic remove tool to push up the heat vent.

Use a plastic remove tool to push up the heat vent
3-1
3-1

4. Remove 2 hidden screws with a screwdriver below the vent.

Remove 2 hidden screws with a screwdriver below the vent
4-1
4-1

5. Push down the vent and loose it.

Push down the vent and loose it

6. Remove the trim panel with a plastic removal tool.

Remove the trim panel with a plastic removal tool

7. Remove 2 screws that are holding the car radio.

Remove 2 screws that are holding the car radio
7-1
7-1

8. Take out the original car radio.

Take out the original car radio

9. Unplug the connectors and cables at the back of the radio.

Unplug the connectors and cables at the back of the radio

10. Check all the accessories for the new Seicane car radio.

Check all the accessories for the new Seicane car radio

11. Connect the harnesses to the back of the new Seicane car radio.

Connect the harnesses to the back of the new Seicane car radio

12. Connect the Seicane car radio to your original radio’s plugs.

13. Turn on the new Seicane car radio to have a careful check if everything works well. If it doesn’t, please check whether all the cables are connected correctly.

14. Put the new Seicane car radio into the dash.

15. Put everything into their original place. All the installation is done.


Before installation, please make clear every detailed step. If you have anything you cannot understand, please feel free to consult your dealer for a wiring diagram, seek advice from someone experienced or turn to a professional for help. Anyway, it is especially important for you to select an ideal car radio for your beloved car. If you have no ideas, I’d like to share an excellent 2000-2005 Mercedes Benz C Class W203 C180 C200 C220 C230 C240 C270 C280 car radio from Seicane with you. For more details, please click:

http://www.seicane.com/7-inch-pure-android-2000-2005-mercedes-benz-c-class-w203-c180-c200-c220-c230-c240-c270-c280-multimedia-gps-radio-car-audio-system-with-hd-1024-600-touch-screen-3g-wifi-dvd-player-bluetooth-obd2-mirror-link-backup-camera-s127507e

Based on the most advanced Android 6.0 operation system, 8-core 1.5 GHz RK-PX5 A53 processor and 2GB RAM as well as 32GB INand Flash, this powerful car radio can be taken into your consideration when you pan to upgrade your factory radio in a 2000-2005 Mercedes Benz C Class W203 C180 C200 C220 C230 C240 C270 C280.

This intelligent car radio comes with a wide range of comprehensive features, including 3D GPS navigation system, FM/AM radio tuner, Bluetooth hands-free calls, Bluetooth streaming music, CD/DVD player, file management, steering wheel control, USB&SD connection, etc. With these strong comprehensive features, you are able to be provided with the best driving experience full of safety, comfort, convenience and enjoyment.

Just add this intelligent car radio to your shopping cart right now and wish you enjoy your driving from now on! Good luck to you!

How to Successfully Achieve 2008-2014 Toyota Highlander GPS Bluetooth Car Radio Upgrade

2008-2014 Toyota Highlander GPS Bluetooth Car Radio after installation

To improve your in-car environment and take your driving experience up a notch, I would like to suggest you to upgrade your factory radio by installing a brand new car radio which is compatible with a wide range of comprehensive features to meet almost all your needs in car. And to succeed in the upgrade, a detailed installation guide is especially necessary. Here I would like to introduce how to install a 2008-2014 Toyota Highlander car radio. If you have the same dashboard, you can take this guide as reference.

2008-2014 Toyota Highlander GPS Bluetooth Car Radio after installation

Tips about the installation:

1. Please disconnect the power before the installation.

2. Please prepare a lever and a screwdriver before the removal and the installation.

3. Please keep all the separate parts from the car. Please take great care of the dashboard to avoid scratching it during its detachment and installation. Please keep handy any parts from the car and make use of all the original screws from the car as much as possible. so each related part of the unit can be fixed securely.

4. For your convenience, here’s the recommended tools for removal and installation from Seicane, please check for more details: http://www.seicane.com/car-dvd-dismantling-device-srd-400

2008-2014 Toyota Highlander car radio installation guide

1. Carefully pry lower dash panel out.

Carefully pry lower dash panel out
1-1
1-1

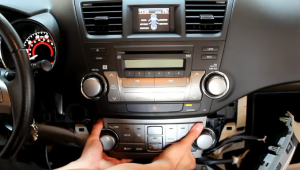
2. Grip onto the A/C control panel, and give it quick tug to remove.

Grip onto the A/C control panel, and give it quick tug to remove

3. Gently pry out air vent and bazel above the radio.

Gently pry out air vent and bazel above the radio

4. There are four 10mm bolts to be removed.

There are four 10mm bolts to be removed

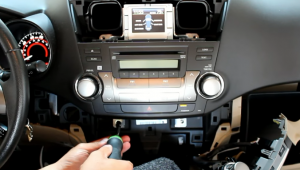
5. Remove these four 10mm bolts with a screwdriver.

Remove these four 10mm bolts with a screwdriver

6. Gently pull the radio out of the dashboard.

Gently pull the radio out of the dashboard

7. Disconnect the connectors and cables at the back of the radio.

8. Check all the accessories for the new Seicane car radio.

Check all the accessories for the new Seicane car radio

9. Connect the harnesses to the back of the new Seicane car radio.

Connect the harnesses to the back of the new Seicane car radio

10. Connect the Seicane car radio to your original radio’s plugs.

11. Turn on the new Seicane car radio to have a careful check if everything works well. If it doesn’t, please check whether all the cables are connected correctly.

12. Put the new Seicane car radio into the dash.

13. Put everything into their original place.


That’s all about how to install a brand new car radio for 2008-2014 Toyota Highlander. If you have any doubts, you can consult your dealer for seeking advice or ask a professional for help. However, if you haven’t had any related installation experience ever before, you’d better go to a car radio upgrade center to arrange a technician to help you install the radio directly.

Besides, here I would like to share a remarkable 2008-2014 Toyota Highlander GPS Bluetooth Car Radio from Seicane with you for your reference. For more details, please click:

http://www.seicane.com/10-1-inch-pure-android-2008-2014-toyota-highlander-radio-removal-with-sat-nav-car-audio-system-1024-600-multi-touch-capacitive-screen-mirror-link-obd2-3g-wifi-aux-s121012e

With this remarkable 2008-2014 Toyota Highlander car radio in your car, you are able to build up a more convenient, more comfortable and more relaxing in-car environment as well as a high-quality driving experience.

Loaded with the latest Android 6.0 operation system, 8-core 1.5 GHz RK-PX5 A53 processor and 2GB RAM, this unit provides you with smoother, faster and better operation experience and performance.

The large 10.1 inch HD 1024*600 multi-touch screen enables you to enjoy the amazing display effect when you are watching videos, TV programs and movies, etc as well as have a perfect view of the road ahead.

Thanks to the high-precision GPS navigation system, you are able to quickly know your current locations and find the most suitable way to accurately reach your desired destinations according to turn-by-turn directions and voice prompts.

Wish you like it and good luck to you!