In a BMW, there’s nothing better than installing a car radio, especially if the driver is used to using the way of carplay during the driving time. And it is regarded as the smartest and the safest way to use your phone while you’re on the road. Therefore, most of those who pursue high-quality driving life will always put the installation of car stereo as an important role as the correct installation steps can help them reduce the budget as well as the extra energy. As for those who has no experience before installation, I sincerely recommend you to read the following easy guide for BMW 5 Series E60 2009-2012 Stereo Navigation System as a reference.

Before installation, you should pay attention to some important tips. First of all, you can disconnect the power and prepare some tools such as lever before the removal and the installation. Secondly, you should keep all the separate parts from the car and take great care of the dashboard to avoid scratching it during its detachment and installation.
Last but not least, you should keep handy any parts from the car and make use of all the original screws from the car as much as possible so that each related part of the unit can be fixed securely.
Installation Instruction of Navigation for BMW 5 Series E60 2009-2012 Radio
Step 1: Take off the left screw and the right screw.

Step 2: Lever original car screen frame and Pull out the frame.

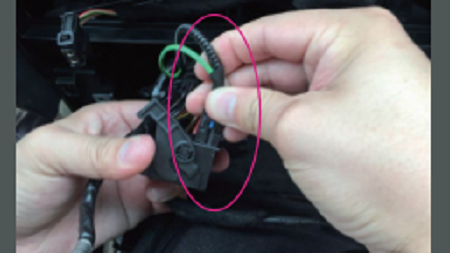
Step 3: Disconnect LVDS connector and the power cable.

Step 4: Lever the vent panel as reveal from the right side and the middle vent panel from the bottom.

Step 5: Lever the left panel as reveal and Take off the emergency light cable.

Step 6: Take off the left screw and the screws on the right side.

Step 7: Pull out the air conditioner panel and Unplug air conditioner connectors

Step 8: Lever the box from the right side and the same box from its left side.

Step 9: Take off the 2 screws, then Pull out the head unit and disconnect power cable.

Step 10: Pull out new wires( power cable, USB wire,GPS antenna) and original car LVDS connector.

Step 11: Connect above wires with the new android screen

Step 12: Install new screen, first put bottom inside, then fix the screen to stand and adjust to exact screw position on the top.

Step 13: Fix the screws and take out original car optical fiber connector.

Step 14: Connect original car power cable with new power cable and the unplugged fiber optical connector with new wiring.

Step 15: Connect new power cable with the car head unit, then Install the head unit and fix the 2 screws.

Step 16: Put the AC vent assembly back and fix 2 screws.

Step 17: After installing AC panel, Connect emergency light wire and Put emergency light assembly back.

After the installation, you can check whether the new head unit can be used as normal. And as you can see the process of the installation is not difficult as long as you would like to learn these steps above even you have no skills before. However, if you think there is still a bit hard for you to get these knowledge from the article, you can ask for a trained professional technicians for help or consult your car dealer directly. There are dozens of resource available on the Internet and you can click them for more information as you wish. Here I would like to shark a link of a product of BMW 5 Series E60 Car Audio System from Seicane. Hope you can benefit from it as you want.
With the latest and fastest responsive operation System -Android 10.0, it supports your entertainment time in a more flexible way. Besides, without uninstalling your old stereo, this new android car navigation system will keep your original radio ,idrive system and amplifer system.
Compared to other car radio ,this one can provide a chance for you to hear from the center being surrounded from all direction instead of hearing of the main sound from front right direction. In addition, with high speed CPU and large storage, you can download various apps and make phone call as smooth as usual when you are driving on the road.
Last but not least, it can be connected to the Internet whenever you drive, and the DVR functions can support you to record every moment in your journey, which will make you never miss anything. So if you have desire to make your car a place you love to be, please grab this chance from now on.


Recent Comments