Since I bought the 2010 Ford Fiesta, I’ve been stuck with the old factory radio in the dashboard. Just last month, I made up my mind to get it changed. One of my friends suggested me to get an aftermarket radio to replace the factory stereo, and finally I had this Tesla screen radio for the Fiesta.

How to install the new unit?
I successfully installed the new Ford Fiesta Tesla screen with the help of my uncle, he is a professional auto mechanic working at Jeep company. Now, let’s see how we did that.
Important tips: 1) Prepare your tool box. 2) Cut off the car power before starting the replacement work.
Take a look at the factory radio of my 2010 Ford Fiesta.

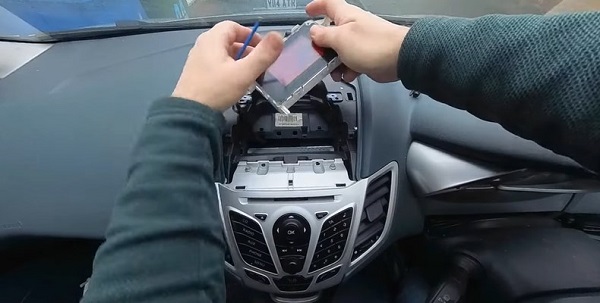
1. Pry to remove the plastic cover on the top.

2. Remove these 4 screws. Then take down the small screen and unplug the cable.

3. Now pry to remove this small piece at the bottom.

4. Remove screws that fix the button panel.

5. Take down the panel and unplug its cable to the car.

6. Next pull out the main unit, also need to unplug the cables.


7. We’ll go to install the new touch screen radio head unit, make sure it comes everything you need.

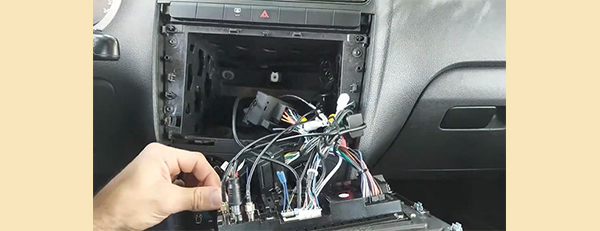
8. Correspondingly connect the new cables of the new radio to the car.

9. Remove the A/C outlets on the button panel, and install them to the new radio, then connect the new radio to the car via the new cables. Check the manual if you are not sure the wiring ports.

10. Put the new radio system to the dashboard, have a test for it before fixing it well. If the new radio doesn’t work well, check again the wiring conditions, and ask the seller for help when needed.

What are the features and functions?
This big touch screen stereo can be suitable for Ford Fiesta at 2009 2010 2011 2012 2013 2014 year. It adds much good look to the inside of the car. On one hand, it equips a 9.7″ QLED screen, showing fresh unique user interface with dynamic graphics. On the onther hand, loaded with Android 10.0 system and 8-core CPU, the unit is super fast to response and easy to operate.
Compared to the old radio system, this Android head unit also offers various wonderful functions. For example, in terms of entertainment, you can enjoy Bluetooth music, listen to FM/AM radio, watch 1080P videos on Youtube, access to the Internet for more fun etc.
For me, I love the Carplay function very much. The unit is with built-in wireless Carplay, as well Android Auto. By Carplay connection, the radio will act as the Phone, allowing me to apply phone music, phone call, phone map etc. on the radio display. That’s the safest way to use phone on the car.

Another awesome function is that I can connect a rear view camera to the radio. Every time when I reverse the car, the radio will automatically switch to the rear images, thus I can see the rear situation clearly to avoid any collision. For those who always have trouble in backing a car, a touch screen car radio system which is able to support rear view camera is more helpful.


Recent Comments