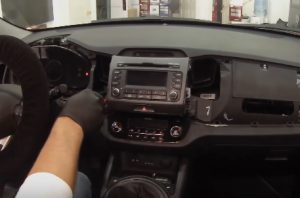
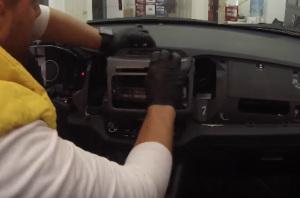
If your factory radio cannot satisfy you in car since it cannot be compatible with some upgraded features, you can think about replacing your factory radio with a new aftermarket car radio. This article aims to introduce how to remove the factory radio and install the new car radio in 2010 2011 2012 2013-2015 KIA Sportage, if you own the same or similar dashboard, you can carefully refer to the following installation steps, which may help with the installation.

Before and during installation, you should notice:
1. Before connecting, please make sure the ignition is off to avoid short circuit.
2. Ensure connect the yellow and red power cable at last.
3. Ensure that all loose wires are isolated with electrical tape
4. Ensure don’t tangle the wire when tighten the moving parts(Such as seat rails).
5. Ensure that all ground is connected to the same place.
6. Using the improper fuse may cause damage of fire, so when replace the fuse, please consult the professional.
7. For your convenience, here’s the recommended tools for removal and installation from Seicane, please check for more details: http://www.seicane.com/car-dvd-dismantling-devicesrd-400
2010 2011 2012 2013-2015 KIA Sportage car radio installation instruction
1. The original car radio.

2. Uncover the screw covers on each corner and then remove the two screws with a screwdriver.


3. Adjust the steering wheel so as to release the panel on the left side of the radio and then remove it. Don’t forget to disconnect the connectors at the back.


4. Remove the panel on the right side of the radio with a plastic removal tool.

5. Remove two screws that fixed the radio panel, then remove the panel and unplug the connector at the back.


6. Remove four screws that are holding the radio on the dashboard.

7. Take out the original radio and unplug the connectors at the back of it.


8. Check all the accessories for the new Seicane car stereo.

9. Connect the harnesses to the back of the new Seicane car stereo.

10. Connect the Seicane car stereo to your original stereo’s plugs.
11. Turn on the new Seicane car stereo to have a careful check if everything works well. If it doesn’t, please check whether all the cables are connected correctly.
12. Put the new Seicane car stereo into the dash.
13. Put everything into their original place. All the installation is done.
Wish you can learn some skills from the above installation instruction. If you meet any difficulties and don’t know how to overcome them, please feel free to contact your dealer, communicate with someone experienced or turn to a professional technician for help. If you still think it hard to install the new car radio, you can directly go to a car radio upgrade center to have the car radio installed by a professional technician.
Anyway, before installation, please carefully pick an ideal car radio for your beloved car. Here I’d like to share a remarkable 2010 2011 2012 2013-2015 KIA Sportage car radio from Seicane with you. Fore more details, please click:
This car radio is loaded with the stable Android 6.0 operation system and a powerful quad-core CPU processor, therefore, with this car radio installed in your car, you will embrace a much smoother, faster and easier operation experience.
There are a wide range of practical and entertainment features being offered by this all-in-one car radio, mainly including 3D GPS navigation system, FM/AM radio, Bluetooth hands-free phone calls, Bluetooth streaming music, AUX function, file management, etc.
Under the wireless Bluetooth technology, through the Bluetooth connection between your Bluetooth-enabled mobile phone and this car radio, without taking your hands off the steering wheel, you are able to dial, answer, reject and mute Bluetooth hands-free phone calls as well as listen to Bluetooth streaming music from your phone.
What are you waiting for? This unit is at a competitive price now. If you like it, just add it to your shopping cart.


I bought this and none of the cables fit the ones in my car
“Dear,
so sorry for the inconvenience.
In order to give you a fast solution,we suggest you asked our after sales staff for help.
The email is Sales1@seicane.
Have a good day!”
Having trouble with two things 1 Range of radio antenna 2 having trouble with Bluetooth I may not have programed into need proper and full instructions please and thank you
please email us at [email protected]
dear,
to help you quickly,could you tell us your order number?
Can’t seem to find my invoice but I checked out all the connections every thing is tight
Steering wheel radio control
Poor radio range
Bluetooth can not be controlled by voice
Thank you Ned
My payment confirmation # is8012733770537583 thanks Ned
Confirmation number as you requested is 8012733770537583 please help me now
Waiting for reply
Dear
to help you quickly,plz contact our Aliexpress staff.because they will be more familiar with your order.hope you could understand.
Hi.
Would you tell me how to connect an external amplifier to Seicane unit.
I know that I must have a remote cable (usually blue color) and RCA outputs coming out of unit to subwoofer but I don’t know how to identifie them with different name tags. Thank you
“Dear,
so sorry for the inconvenience.
In order to give you a fast solution,we suggest you asked our after sales staff for help.
The email is Sales1@seicane.
Have a good day!”