As the technology rapidly develops, an ideal car radio should be compatible with a higher performance and various functions. If your factory radio can not support many modern features, then it is wise of you to replace your factory radio with a new aftermarket car radio. The following is a straightforward 2008 2009 2010 2011 2012-2017 JEEP Wrangler car radio installation instruction from Seicane. If you have the same or similar dashboard, you can refer to this instruction carefully.

4 tips about the installation:
1. Please disconnect the power before the installation.
2. Please prepare a lever and a screwdriver before the removal and the installation.
3. Please keep all the separate parts from the car. Please take great care of the dashboard to avoid scratching it during its detachment and installation. Please keep handy any parts from the car and make use of all the original screws from the car as much as possible. so each related part of the unit can be fixed securely.
4. For your convenience, here’s the recommended tools for removal and installation from Seicane, please check for more details: http://www.seicane.com/car-dvd-dismantling-devicesrd-400
2008 2009 2010 2011 2012-2017 JEEP Wrangler car radio installation instruction
1. Get the window control out of the original place, so that you can get access to the screw that is behind it.

2. Here we use a precision flat-head screwdriver with cotton cloth, which make sure it not to scratch the window control.


3. You may start from the corner, which makes it easier for you to get behind and you should be able to pop it up and make it come right out.


4. There is a clip and you need to push it down and make it come right off, after that, put this window control to the side.


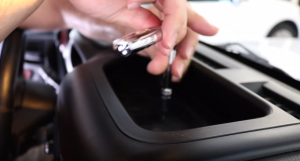
5. Use a seven millimeter screwdriver socket to remove the bolt behind the window control and the in the upper tray.


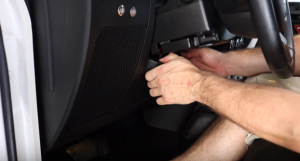
6. Next you are going to pull away the trim under the steering wheel.


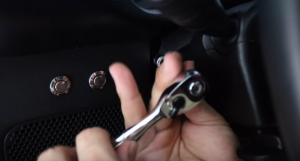
7. With the trim removed, you are going to remove two bolts on either side of the steering column with a seven millimeter socket set.

8. Firmly pull the dash and it should be clipped out.


9. With the dash removed, you now can have access to the four bolts that are holding the original car radio.

10. Remove these four bolts with the seven millimeter screwdriver.

11. With all the bolts removed, the original car radio should simply slide out from the original place.


12. Disconnect the factory connectors and wires at the back of the original car radio.

13. Check all the accessories for the new Seicane car radio.

14. Connect the harnesses to the back of the new Seicane car radio.

15. Connect the Seicane car radio to your original radio’s plugs.
16. Turn on the new Seicane car radio to have a careful check if everything works well. If it doesn’t, please check whether all the cables are connected correctly.
17. Put the new Seicane car radio into the dash.
18. Put everything into their original place. All the installation is done.
Wish the above installation guide can be helpful for you. If you have any doubts, please don’t hesitate to consult your dealer, someone experienced or turn to a professional for help. Anyway, before installation, please select an ideal car radio for your beloved car. If you don’t have any ideas, you might as well check out the following link which is an amazing 2008 2009 2010 2011 2012-2017 JEEP Wrangler car radio from Seicane.
This intelligent car radio for a 2008 2009 2010 2011 2012-2017 JEEP Wrangler can be regarded as one of the best replacements for your outdated factory radio. It is running on the most advanced and stable Android 7.1.2 operation system and a high-quality quad-core CPU processor to enhance your car’s capabilities and performance.
When you turn on the GPS navigation system, you are able to know your current locations and get the optimal route option to reach your desired destinations through turn-by-turn directions and voice prompts. And with dual zone function, this unit enables you to listen to your favorite music while navigating, which won’t have any negative influence on GPS navigation function.
Wish you enjoy your trip accompanied by this unit. Good luck to you!


I need a new usb cable, is there a better option? this one is braking on the connectors that attach to the radio
Hello
or please email us at [email protected]
Hello
My Seicane head Unit time to time goes on black screen, and won´t come out of it, unless I disconnect my car battery (jeep Wrangler 2012)
“Dear,
so sorry for the inconvenience.
In order to give you a fast solution,we suggest you asked our after sales staff for help.
The email is Sales1@seicane.
Have a good day!”