 Many cars are equipped with a factory navigation system built into the dashboard. Maps are stored as software, so once new roads and intersections are developed or changed, the map will be out of date. More and more people are getting tired of the old one, and they are seeking for new GPS navigation system to satisfy their increasing demand. But installing it by themselves is a big problem. Don’t worry, here are some installation tips on 2013 2014 2015 2016 2017 2018 BMW 6 Series F06/F12 NBT GPS Navigation Radio, if you have a similar one, you can take it as a reference.

2013 2014 2015 2016 2017 2018 BMW 6 Series F06/F12 NBT GPS navigation radio after installation
Friendly reminder:
1. Please disconnect the power before the installation.
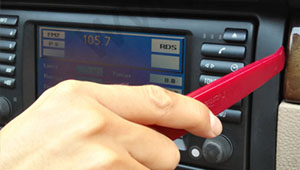
2. Please prepare a lever and a screwdriver before the removal and the installation.
3. Please keep all the separate parts from the car. Please take great care of the dashboard to avoid scratching it during its detachment and installation. Please keep handy any parts from the car and make use of all the original screws from the car as much as possible. so each related part of the unit can be fixed securely.
4. For your convenience, here’s the recommended tools for removal and installation from Seicane, please check for more details: http://www.seicane.com/car-dvd-dismantling-device-srd-400
2013 2014 2015 2016 2017 2018 BMW 6 Series F06/F12 NBT GPS navigation radio installation guidance
1. Original dashboard.

Original dashboard.
2. Pry loose the right side air outlet.

Pry loose the right side air outlet.
3. Pry loose the left side air outlet.

Pry loose the left side air outlet.
4. Take out the air-conditioning decorated plate.

take out the air-conditioning decorated plate.
5. Take out the decorated strip.

Take out the decorated strip.
6. Remove four fixed screws.

Remove four fixed screws.
7. Pry loose and take out the panel.

Pry loose and take out the panel.
8. Remove four screws of original host.

Remove four screws of original host.
9. Remove two screws of the monitor.

Remove two screws of the monitor.
10. Take out the original monitor.

Take out the original monitor.
11. Connect the original power harness with Android cable.

Connect the original power harness with Android cable.
12. Fixed the plastic cover of Android unit to original dashboard.

Fixed the plastic cover of Android unit to original dashboard.
13. Full test.

Full test.
14. Please put everything into their original place.
By now, do you have a general knowledge about the 2013 2014 2015 2016 2017 2018 BMW 6 Series F06/F12 NBT car radio installation? If you still have any questions that you don’t know how to solve, you can call your supplier to talk with skilled people or ask a professional technician for valuable help. Also, you can directly go to the car radio upgrade center and arrange a professional technician to get your new car radio installed. Anyway, you must choose the best way to install you car radio, so that you can avoid unnecessary damage to your car and car radio. If you are thinking about how to choose an ideal car radio for you beloved car, here I would like to share with you the excellent 2013 2014 2015 2016 2017 2018 BMW 6 Series F06/F12 NBT GPS Navigation Radio from Seicane. Please click for more information:
Designed for the 2013 2014 2015 2016 2017 2018 BMW 6 Series F06 / F12 NBT, this outstanding car radio has a variety of features and can help you enjoy a better driving experience, including 5 point touch screen, 6-core Rockchip PX CPU, GPS, video output, Carplay, etc. Since the unit designed with these entertainment features and practical functions, this remarkable radio can meet almost all your needs. Take the Carplay function as an example. This Carplay USB dongle can support the CARPLAY USB product. Support all Android car DVD products, the original car voice control, the original car screen touch.
Such a fascinating unit, why not buy now?


Recent Comments