
With the improvement of people’s life, more and more families prefer to buy car for outside activities. However, the factory radio seems can not satisfy their needs, most of them choose to install a Bluetooth Radio GPS System which make it possible to listen to radio or music while navigation. This kind of function may entertain the dull journey and comfort the naught children. There is no doubt that Bluetooth Radio GPS System can make you trip more convenient and easier. Since most people have no idea of how to install the devices, here we will share you a simple way of how to install a 2007-2018 Toyota FJ CRUISER Bluetooth Radio GPS System. You can follow the steps as the video if your car is similar to this one.
Preparation for Installation:
1.Make sure the power has been cut off before installation to avoid any danger.
2. Check your professional car radio dismantling tools, screwdriver, 3M electronic tape, 3M double side tape, sleeve, cotton cloth.
3. Keep all the separate parts from the car.
4. For your convenience, here’s the recommended tools for removal and installation from Seicane, please check for more details: http://www.seicane.com/car-dvd-dismantling-device-srd-400
2007-2018 Toyota FJ CRUISER Bluetooth Radio GPS System Disassembly and Installation Steps:
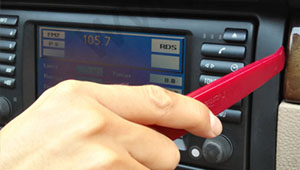
1. Original dashboard
2. Remove the frame of both left and right side
3. Remove the two screwson each side
4. Take the main frame out and pull out the plug on it
5. Remove the screws inside and take the original radio out
6. Pull out the plug on the original radio
7. Install the new screen on the main frame
8. Plug well the power harness/USB cable/GPS antenna
9. Fasten the two screws on the main frame
10. Fix the two frames on each side
11. Full Test
If you still don’t know how to operate after watching the video, you can find professional people around you to help you install the device. And if you don’t know which Bluetooth Radio GPS System is suitable for you, I would like to share you a 2007-2018 Toyota FJ CRUISER Bluetooth Radio GPS System for you. You can click the following link to find more details:
With intelligent pure Android 8.1 operation system and 9 inch full touchscreen, it will be your perfect road companion. The system supports surfing internet via 3G or WiFi.You can download any applications in the android market for access to games.The car stereo is equipped with worldwide real-time navigation function of high accuracy. These function will provide you the best driving experience.
If you are interested in this devices, please don’t hesitate to contact us!


Recent Comments