How to upgrade a 2013 2014 Suzuki S Cross android radio dvd gps with Bluetooth Rearview camera

2013 2014 Suzuki S Cross android radio dvd gps after installation.

Are you annoyed at your factory radio that cannot be compatible with a range of new features? If your answer is yes, then it’s high time for you to replace your factory radio with an advanced car stereo. An up-to-date car stereo can improve your in-car environment and driving experience. And it is easy for you to install a car stereo on your own under a detailed installation guide. This passage mainly introduces how to upgrade a 2013 2014 Suzuki S Cross car stereo, if you have the same dashboard as followings, you may refer to it.

2013 2014 Suzuki S Cross android radio dvd gps after installation.

Precautions for this installation:

1.Before you start up any work, park your car well and unplug the negative power cable to avoid any danger.

2.Please make sure that all fastened wires are isolated with electrical tape.

3.Please make sure the ignition is off to avoid short circuit.

4.Please prepare a lever and a screwdriver before the removal and the installation.

5.For your convenience, here’s the recommended tools for removal and installation from Seicane, please check for more details: http://www.seicane.com/car-dvd-dismantling-device-srd- 400


2013 2014 Suzuki S Cross car stereo installation steps

1. The original car radio.

The original car radio

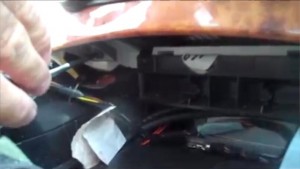
2. Remove the light with a plastic knife and unplug the connector at the back of the indicator light.

Remove the light with a plastic knife and unplug the connector at the back of the indicator light
2-1
2-1
2-2
2-2

3. Remove the original panel with a plastic knife, pry gently along the gap and pick up the panel, then remove it and then set it aside.

Remove the original panel with a plastic knife, pry gently along the gap and pick up the panel, then remove it and then set it aside

4. Remove screws that fixed the radio on the dashboard.

Remove screws that fixed the radio on the dashboard
4-1
4-1

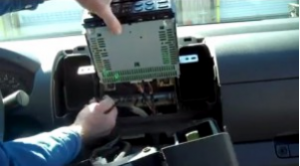
5. Gently pull the factory radio out of the dash. Pull it with medium force, as the wires are connected to the radio.

Gently pull the factory radio out of the dash. Pull it with medium force, as the wires are connected to the radio

6. Unplug the connectors at the back of the factory radio. Use a plastic knife if it is necessary.

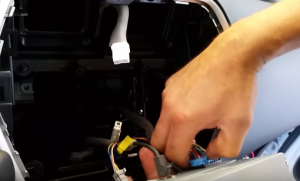
Unplug the connectors at the back of the factory radio. Use a plastic knife if it is necessary
6-1
6-1

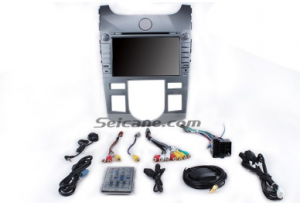
7. Check all the accessories for the new Seicane head unit.

Check all the accessories for the new Seicane head unit

8. Connect the harnesses to the back of the new Seicane head unit.

Connect the harnesses to the back of the new Seicane head unit

9. Connect the Seicane head unit to your original head unit ‘s plugs.

10. Turn on the new Seicane head unit to have a careful check if everything works well. If it doesn’t, please check whether all the cables are connected correctly.

11. Put the new Seicane head unit into the dash.

12. Put everything into their original place. All the installation is done.


The above is the whole installation processing for a 2013 2014 Suzuki S Cross car stereo, it is not complicated, isn’t it? During the installation, if you meet with difficulties, you can ask your dealer or a professional for help. But if you don’t have an ideal car radio for your beloved car, I’d like to recommend a 2013 2014 Suzuki S Cross car stereo from Seicane to you, please click for more details.

http://www.seicane.com/8-inch-2013-2014-suzuki-s-cross-android-radio-dvd-gps-navigation-system-with-hd-1024-600-touch-screen-bluetooth-obd2-dvr-rearview-camera-tv-1080p-video-usb-sd-3g-wifi-ipod-steering-wheel-control-mirror-link-s168073

This car radio for 2013 2014 Suzuki S Cross comes with a digital HD 1024*600 multi-touch screen which provides you with not only sensitive operation but also best visual effects. It will guide you to any unfamiliar destinations with its powerful 3D GPS Navigation of high accuracy.

As for the entertaining options, you don’t have to worry about them. Because in the motion, you are able to play not only movies or videos but also CDs, VCDs, Bluetooth music, and FM/AM radio to relax both you and your passengers. Wish you like it and have a nice day!

How to upgrade a 2008-2012 KIA CERATO (AT) gps Bluetooth car radio with dvd player Touch screen

Seicane 2008-2012 KIA CERATO (AT) gps Bluetooth car radio after installation

One of the easiest way to improve the in-car environment is to upgrade a brand new car radio with both practical functions and entertainment features. Some car owners with relevant installation experience are capable of replacing their factory radios with high-end radios but as for green hands, they have to arrange a professional to help them install car radios, which may cost much money and waste time. Whoever you are, to save your money and time, the following installation guide for a 2008-2012 KIA CERATO (AT) gps Bluetooth car radio can be taken as a reference.

Seicane 2008-2012 KIA CERATO (AT) gps Bluetooth car radio after installation

Some tips before the installation:

1.Please disconnect the power before the installation.

2.Please prepare a lever and a screwdriver before the removal and the installation.

3.Please keep all the separate parts from the car. Please take great care of the dashboard to avoid scratching it during its detachment and installation. Please keep handy any parts from the car and make use of all the original screws from the car as much as possible. so each related part of the unit can be fixed securely.

4.For your convenience, here’s the recommended tools for removal and installation from Seicane, please check for more details: http://www.seicane.com/car-dvd-dismantling-device-srd-400


2008-2012 KIA CERATO (A T) car radio installation guide

1.Remove the right air conditioner vent with a removal tool, and set it aside.

Remove the right air conditioner vent with a removal tool, and set it aside

2.Remove the left air conditioner vent in the same way as step 1, and set it aside.

Remove the left air conditioner vent in the same way as step 1, and set it aside

3.Unscrew all the screws holding the original car radio in dash with a screwdriver.

Unscrew all the screws holding the original car radio in dash with a screwdriver

4.Gently take the original car radio out of the dash.

Gently take the original car radio out of the dash

5.Disconnect all connectors at the back of the original car radio.

6.Check all the accessories for the new Seicane car radio.

Check all the accessories for the new Seicane car radio

7.Connect the harnesses to the back of the new Seicane car radio.

Connect the harnesses to the back of the new Seicane car radio

8.Connect the Seicane car radio to your original car radio ‘s plugs.

9.Turn on the new Seicane car radio to have a careful check if everything works well. If it doesn’t, please check whether all the cables are connected correctly.

10.Put the new Seicane car radio into the dash.

11.Put everything into their original place. All the installation is done.


Wish the above 2008-2012 KIA CERATO (A T) car radio installation guide can help you in some sense. If you don’t understand it totally, please seek help from your dealer. Before the installation, please check if your car radio fits well with your beloved car. If it can not work well, you’d better buy a new one. Here is a smart 2008-2012 KIA CERATO (A T) car radio from Seicane I recommend to you, you can click the link for more details.

http://www.seicane.com/oem-android-radio-gps-navigation-system-for-2008-2012-kia-cerato-at-with-bluetooth-mp3-hd-1024-600-touchscreen-dvd-player-obd2-dvr-rearview-camera-tv-3g-wifi-steering-wheel-control-usb-sd-1080p-video-mirror-link-s168045

This double din gps Bluetooth car radio is special designed for 2008-2012 KIA CERATO (AT), which remains the original functions of the steering wheel control as well as increases more practical and entertainment features. By simply pressing the GPS button, you can take advantage of accurate 3D positioning to find your way to your destination via text-to-speech guidance. Furthermore, the application of Bluetooth technology helps you have hands-free calls without keeping your hands off the steering wheel, which brings you more convenience and security. As for the entertainment functions, this car radio allows you to play Bluetooth music, CDs, DVDs, TV programs, films, etc. Just make this fantastic 2008-2012 KIA CERATO (AT) car radio along with you on your way.

The step-by-step installation guide for a 2004-2010 Nissan VERSA Bluetooth gps dvd stereo with Android5.1.1 Touch Screen

2004-2010 Nissan VERSA Bluetooth gps dvd stereo after installation

In the past you may spent money or time in arranging professionals to install car accessories for your car. But now it will save you a lot of money as well as time if you have the ability to change your original aftermarket or accessories especially a car stereo. Here is a detailed installation guide from Seicane for a 2004-2010 Nissan VERSA Bluetooth car stereo. It can be taken as reference for you if you want to try changing a new car stereo by yourself.

2004-2010 Nissan VERSA Bluetooth gps dvd stereo after installation

Here are 4 tips about the installation:

1.Please disconnect the power before the installation.

2.Please prepare a lever and a screwdriver before the removal and the installation.

3.Please keep all the separate parts from the car. Please take great care of the dashboard to avoid scratching it during its detachment and installation. Please keep handy any parts from the car and make use of all the original screws from the car as much as possible. so each related part of the unit can be fixed securely.

4.For your convenience, here’s the recommended tools for removal and installation from Seicane, please check for more details: http://www.seicane.com/car-dvd-dismantling-devicesrd-400


2004-2010 Nissan VERSA car stereo installation guide

1. Use a screwdriver to remove two screws above the Nissan Frontier radio.

Use a screwdriver to remove two screws above the Nissan Frontier radio

2. Remove the trim panel.

Please wedge a flat tip screwdriver under the trim panel and pry up on it to remove the trim panel. To protect the trim from being accidentally scratched, you can use a clean rag while prying up on the trim panel.

Remove the trim panel

3. Unscrew the four screws which are holding the factory radio in place with a screwdriver. Then gently take the factory radio off the panel.

Unscrew the four screws which are holding the factory radio in place with a screwdriver. Then gently take the factory radio off the panel

4. Disconnect the radio antenna in the back of the factory radio and unplug the electrical plugs running to the back of the radio.

Disconnect the radio antenna in the back of the factory radio and unplug the electrical plugs running to the back of the radio

5. Check all the accessories for the new Seicane head unit.

Check all the accessories for the new Seicane head unit

6. Connect the harnesses to the back of the new Seicane head unit.

Connect the harnesses to the back of the new Seicane head unit

7. Connect the Seicane head unit to your original car radio ‘s plugs.

8. Turn on the new Seicane head unit to have a careful check if everything works well. If it doesn’t, please check whether all the cables are connected correctly.

9. Put the new Seicane head unit into the dash.

10. Put everything into their original place. All the installation is done.


Now for the installation of a car stereo, whether you have a certain degree of understanding or not? If you cannot successfully install your new car stereo, it will be a better idea to ask your dealer or professionals for help. One thing you have to pay more attention to is: you ought to have an ideal car stereo for your car. If you are still looking for a suitable one, please click the link below for more details.

http://www.seicane.com/2004-2010-nissan-versa-androi-dvd-player-gps-navigation-system-bluetooth-radio-hd-1024-600-touch-screen-mirror-link-obd2-dvr-tv-3g-wifi-usb-sd-rearview-camera-1080p-video-s166226

This latest 2004-2010 Nissan VERSA car stereo comes with functions, including 3D GPS navigation system, CD/DVD player, Bluetooth technology, rearview camera, etc, from which you can get a lot convenience. When you travel around a city, a smart car stereo with these features can not only guarantee your driving safety and comfort but also can provide you with an unforgettable holiday. If you like it, do not hesitate to take it home. Good luck to you!

The easy way to upgrade a 1998-2004 Mercedes Benz CLK Class C209 bluetooth dvd gps radio with Android 5.1.1 OBD2

Look at the picture shown below, it’s the 1998-2004 Mercedes Benz CLK Class C209 bluetooth dvd gps radio after installation from Seicane. If you are the car owner of the Mercedes Benz CLK Class, this passage is worth for you to read it. I’d like to share a detailed installation guide for it and wish you can learn something from that.

1998-2004 Mercedes Benz CLK Class C209 bluetooth dvd gps radio after installation


Some tips before the installation:

1.Please disconnect the power before the installation.

2.Please prepare a lever and a screwdriver before the removal and the installation.

3.Please keep all the separate parts from the car. Please take great care of the dashboard to avoid scratching it during its detachment and installation. Please keep handy any parts from the car and make use of all the original screws from the car as much as possible. so each related part of the unit can be fixed securely.

4.For your convenience, here’s the recommended tools for removal and installation from Seicane, please check for more details: http://www.seicane.com/car-dvd-dismantling-device-srd-400


1998-2004 Mercedes Benz CLK Class C209 bluetooth dvd gps radio installation guide

1. First detach the gear shift panel.

First detach the gear shift panel

2. Remove the car charger and ashtray.

Remove the car charger and ashtray

3. Use a screw driver to remove the screws under the A/C.

Use a screw driver to remove the screws under the A/C

4. Pry the air conditioner panel out with a plastic lever.

Pry the air conditioner panel out with a plastic lever

5. Remove the original air conditioner panel.

Remove the original air conditioner panel

6. Remove the heated seat and control panel assembly.

Remove the heated seat and control panel assembly

7. Remove the screws holding the radio.

Remove the screws holding the radio

8. Pull out the original car radio.

Pull out the original car radio

9. Disconnect the original harness.

Disconnect the original harness

10. Check all the accessories for the new Seicane car radio.

Check all the accessories for the new Seicane car radio

11. Connect the harnesses to the back of the new Seicane car radio.

Connect the harnesses to the back of the new Seicane car radio

12. Connect the Seicane car radio to your original car radio ‘s plugs.

13. Turn on the new Seicane radio to have a careful check if everything works well. If it doesn’t, please check whether all the cables are connected correctly.


If you can’t understand the steps above, you can turn to the dealer to ask for help. Or arrange the professional to install it. Before the installation, the most important thing is find the suitable car stereo for your car. If you are still looking for one, I’d like to recommend the newest 1998-2004 Mercedes Benz CLK Class C209 bluetooth dvd gps radio from Seicane to you as reference.

http://www.seicane.com/seicane-s127507-1998-2004-mercedes-benz-clk-class-c209-clk200-clk230-clk320-android-radio-dvd-navigation-system-with-bluetooth-music-mirror-link-obd2-3g-wifi-flash-hd-1024-600-multi-touch-screen

Featured with 3D high precision GPS and advanced Audio streaming via A2DP Bluetooth system, this multifunctional head unit enables you to enjoy the accurate guidance as well as play music from a mobile phone and make phone calls in the car easily. This amazing 1998-2004 Mercedes Benz CLK Class C209 bluetooth dvd gps radio is right choice for you and your car!