One of the coolest ways to relax in a car is to enjoy your most favorite music while you are navigating to your desired destination under the guidance of the most accurate direction at the same time. If your factory radio can’ t meet your needs any more, it’s wise of you to replace it with a new aftermarket car stereo which can support a wide range of features. Here I’d like to show you a step-by-step 2002-2008 Dodge RAM Pickup radio installation guide from Seicane with you. Wish it can be helpful for you.

Precautions for this installation:
1.Before you start up any work, park your car well and unplug the negative power cable to avoid any danger.
2.Please make sure that all fastened wires are isolated with electrical tape.
3.Please make sure the ignition is off to avoid short circuit.
2002-2008 Dodge RAM Pickup radio installation guide
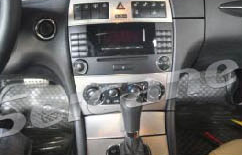
1.Loosen the trim panel with a lever.

2.Take the panel off the dash and disconnect the wires from the car.


3.Remove the four screws which are holding the unit with a screwdriver.

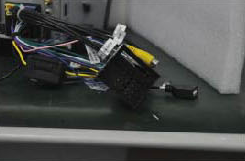
4.Take out the unit and disconnect the wire harness at the back of the unit.
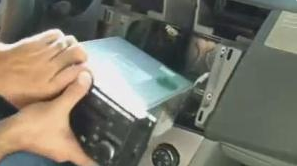

5.Connect the new wiring harness adaptor to the car, then, to the unit.


6.Connect the wire as the user manual shows and put the new unit into the dash.

7.Turn on the new unit and have a test if the new Seicane radio is working without problem..
8.Put trim panel back on your new Seicane radio after the normal test.
Wish you can get some help from the above installation guide for the 2002-2008 Dodge RAM Pickup radio. If there is any question during the process of the installation, you can consult your dealer or a professional for help. If you don’t have enough experience to install a new radio, you’d better have it installed by professionals.
Besides, only a suitable radio can be well installed in your car. If you don’t have one, I’ d like to recommend this excellent 2002-2008 Dodge RAM Pickup radio from Seicane to you, please click:
This modern Dodge RAM Pickup radio features a wide range of practical functions and multimedia options for you to replace your factory radio for higher performance as well as a different driving experience. The 3D GPS function, bluetooth hands-free calls, bluetooth music, DVD player, FM/AM radio, Ipod, wifi, USB and SD connection, etc. are all provided for you to get the convenience in your car. Besides, you can also connect with a backup camera to make your parking easier.


Recent Comments