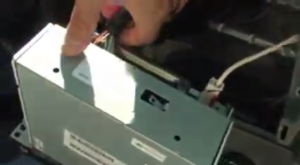
How to remove and upgrade original car stereo autoradio for 2013 2014 2015 Ford F150 F250 F350 Expedition

Look at this image,right! this is Car Stereo for 2013 2014 2015 Ford F150 F250 F350 Expedition.

Ford F150 car stereo after installation

A part of us may have seen this Ford F150 car stereo autoradio when we are shopping in the car market,you want to get it home but you don’t know how to use it in your Ford Expedition.Or maybe you don’t know how to remove and upgrade original car stereo autoradio first.Don’t worry,now I will tell you the convenience way of how to remove and upgrade original car stereo autoradio for Ford Expedition.

First of all,you should get a car stereo autoradioyou’re your Ford Expedition like Ford F150 car stereo:http://www.seicane.com/head-unit-car-stereo-sat-navi-multimedia-player-for-2013-ford-f150-with-gps-radio-dvd-bluetooth-3g-wifi-support-swc-3-zone-pop-c267

Then,we can start remove and upgrade original car stereo autoradio of your Ford Expedition.

Ford Expedition factory stereo removal steps:

1)Remove the rubber pad at the top of the radio trim panel then remove the screws exposed
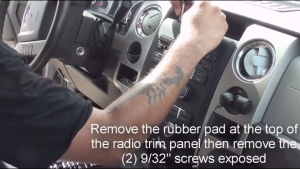
Ford Expedition factory stereo removal step1

2)Unclip and pull the side panels containing the a/c vents away from the radio trim panel.(Note:It is not necessary to remove the panels completely.)

Ford Expedition factory stereo removal step2

3)Unclip and remove the radio trim panel

Ford Expedition factory stereo removal step3

4)Unclip all molex plugs

Ford Expedition factory stereo removal step4

5)Remove screws to remove the factory radio

Ford Expedition factory stereo removal step5

6)Remove stereo and unplug connectors

Ford Expedition factory stereo removal step6

Finally,we removed factory stereo.And next,we can install Ford F150 car stereo.It’s cool!Isn’t it?

Pre-installation notes for 2013 2014 2015 Ford F150 F250 F350 Expedition

1)This products use for the vehicle with 12V battery and negative end.Before the installation,check the battery voltage

2)Before connecting,please make sure the ignition is off to avoid short circuit.

3)Ensure connect the yellow and red power cable at last.

4)Ensure that all loose wires are isolated with electricaltape

5)Ensure don’tangle the wire when tighten the moving parts(Such as seat rails).

6)Ensure that all GND is connected to the same place.

7)Using the improper fuse may cause damage of fire,so when replace the fuse,please consult the professional.

The installation of instruction for 2013 2014 2015 Ford F150 F250 F350 Expedition

1)If the car is not equipped with car drives or navigation,please disconnect the car negative battery terminal.But when the car is equipped with car device or navigation,it will connect the car battery,in order

to avoid short-circuit,should ensure that the bare wires do not touch each other.

2)Demolition control area of the decorative panel.

3)According to the(rear seat wiring diagram)to check the cable connecting again.

4)Carefully view ICA opening tilt angle check the car,according to the tilt angle into the Central District will be the host,until you hear a “click”sound.(Picture-1):

Ford F150 car stereo installation

5)Installed the decorative panel again(Without decorative panel,no need to perform this step).

6)Reconnect the car negative battery terminal.

Dear friends,do you understand how to remove and upgrade original 2013 2014 2015 Ford F150 car stereo autoradio?Hope you can learn something useful from it.


Specific installation steps for 2007 2008 2009 2010 Jeep Wrangler Unlimited DVD GPS navigation system

Before telling about specific installation steps for 2007 2008 2009 2010 Jeep Wrangler Unlimited DVD GPS

 navigation system,I’d like to show you a video first,which can help you know better about new stereo for

Jeep series.

You may have a general idea about this unit after watching this video.It seems to be more convenient when

our car has a radio like this,but you may worry about a question that you have owned one and how can you

get this new one.


In fact you can upgrade your car’s audio system by removing factory cd radio and installing the suitable

Jeep Wrangler Unlimited navigation system.It’s not a thing that can be finished only be technical person,

but also can be a self-done thing if you are willing to patiently learn how to achieve it.


At first,you need to choose a right dvd for your car,and you can do it with the help of a professional

worker.Next job is learn how to replace factory stereo with a new one.If want to know details of the

head unit for Jeep series,I advice you to visit some websites,for example:http://www.seicane.com/

2007-2008-2009-2010-jeep-wrangler-unlimited-dvd-bluetooth-stereo-replacement-hd-touch-screen-

3d-navigation-radio-tuner-tv-pop-1080p-c202.After figuring out these questions,next let’s begin our

installation.


 2007-2010 Jeep Wrangler Unlimited stereo removal and installation:

1.Original dashboard of Jeep Wrangler Unlimited

Original dashboard of Jeep Wrangler Unlimited


2.Prize the trim panel to release it with the help of pry tool

Prize the trim panel to release it with the help of pry tool


3.Remove trim panel and disconnect antennas behind it

Remove trim panel and disconnect antennas behind it


4.Remove 4 screws with a screw removal tool,two on each side

Remove 4 screws with a screw removal tool,two on each side


5.Gently take out factory stereo and disconnect cables back of it

Gently take out factory stereo and disconnect cables back of it


These 6 steps shows specific steps on stereo removal,it’s not complex to do it if you are patient enough.

After a small rest,then we go on the installation for Jeep Wrangler Unlimited.


6.Make antennas and cables connected step by step as next pictures show,and you should be very careful

when you are doing this for it will affect whole procedure

Make antennas and cables connected


Make antennas and cables connected


Make antennas and cables connected
Make antennas and cables connect


7.After ensure your connection is right,install the new unit in right position,and you’d better have a tidy

for the cables before installation to make installation more easily

install the new unit in right position


8.Turn on new stereo and check if your work is right.If it shows yes, then you can fix 4 screws beside

new radio and cover trim panel on the surface of car radio

The aftermarket car stereo DVD GPS nav system of 2007 2008 2009 2010 Jeep Wrangler Unlimited


Precautions after installation:

1.Please use a dried and clean cloth to wipe the touch screen,no other washing products or liquid to do it

2.Do not stare at your new machine especially when you are driving on a crowd road

3.When your car is driving on a abnormal day,for example a rainy day,you should pay more attention on

your head unit for moisture may gather on it;In addition

4.If you have used the aftermarket stereo for a long time and its temperature is over 70 degrees,you’d

better turn it off to protect your sound system


2011 2012 2013 Opel Astra Navigation DVD Bluetooth installation

When you see next stereo which is specially for 2011 2012 2013 Opel Astra, you may feel confused for there

is some difference between this one and original one of car on appearance and functions.


Car head unit after installation,DVD GPS navigation system with bluetooth music of 2011 2012 2013 Opel Astra


Original car’s screen is only used for showing something,while this one’s screen is touch screen that you can

also operate on it with your hand or touch screen pen.


A lot of people have the idea to install a dvd gps for his Opel Astra to catch up with society trend and enjoy

themselves better during driving at the same time.And this is same to aim of this article,because you will see

detailed steps on 2011 2012 2013 Opel Astra Navigation DVD Bluetooth installation today.


Here is a video which will show you main features of the aftermarket stereo of Opel Astra.


Before you begin radio installation,you need to mind a series of things to make your work more smooth.


Precautions about installation:

1.Please remember to turn off your radio and other equipment,and make negative battery cable disconnected

to avoid unnecessary damage to people

2.In addition,when you are doing removal affairs,please place original CD player and removed screws in safe

places to ensure that you can find needed things after you have installed unit in at later time


Next we will talk about how to remove factory stereo and install Opel Astra Navigation system.It’s usual for you

to find some difference between your car radio appearance with the following one,don’t worry and you can take

it as reference because stereos for a series of cars are substantially uniform.


2011 2012 2013 Opel Astra radio removal:

1.Take out all things in this space

Take out all things in this space


2.Lever its surface file panel and use a pry tool to remove it(you may remove it absolutely after next step)

Lever its surface file panel and use a pry tool to remove it


3.Remove this screw and the other corresponding one

Remove this screw and the other corresponding one


4.Loosen this side big trim panel and remove it

Loosen this side big trim panel and remove it


5.Open up two small panels and remove 4 screws under them

Open up two small panels and remove 4 screws under them


6.Take lower notch out and unplug cables at the back of it

Take lower notch out


unplug cables at the back of it


7.Gently get out factory stereo and disconnect cables behind it,you can use a pry tool to remove some tight

ones

Gently get out factory stereo and disconnect cables behind it


8.Pry upper control buttons’s edges around panel and remove it

Pry upper control buttons's edges around panel and remove it
Pry upper control buttons’s edges around panel and remove it


2011 2012 2013 Opel Astra gps navigation installation:

9.Install this panel on new unit,and same to lower control button

Install this panel on new unit


10.Make right cables connection,which is shown in following pictures:

Make right cables connection


Make right cables connection 2


Make right cables connection 3


Make right cables connection 4


11.After that,install new unit into the right place and reinstall other things back to car

reinstall the big trim panel and other panels to the car


When you have finished all these, turn on your new radio and check if it’s installed right and whether functions

can operate.If you want to know better about new radio,you’d better seek some information from the Internet,

for example: http://www.seicane.com/oem-aftermarket-car-radio-upgrade-sat-navi-system-for-opel-astra-with

-fm-am-3g-wifi-3-zone-pop-built-in-gps-dvd-bluetooth-ipod-rearview-c072.


Though this kind of installation is a little more complex than other ones on connecting cables,I have confidence that most of you will make it clear with the help of above 12 specific steps and clear images.