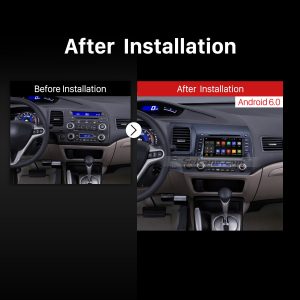
There is no denying that with a remarkable car stereo installed in your car, your in-car life can be taken up a notch. Therefore, more and more car owners are trying to replace their factory radio with a new aftermarket car stereo so as to get access to a lot of upgraded and brand new features. Today I would like to share a detailed 2006 2007 2008 2009 2010-2011 Honda Civic car stereo installation instruction from Seicane with you. If you also own a 2006 2007 2008 2009 2010-2011 Honda Civic, you might as well read the following instruction carefully.

Before and during installation, you should notice:
1.Before connecting, please make sure the ignition is off to avoid short circuit.
2.Ensure connect the yellow and red power cable at last.
3.Ensure that all loose wires are isolated with electrical tape
4.Ensure don’t tangle the wire when tighten the moving parts(Such as seat rails).
5.Ensure that all ground is connected to the same place.
6.Using the improper fuse may cause damage of fire, so when replace the fuse, please consult the professional.
7.For your convenience, here’s the recommended tools for removal and installation from Seicane, please check for more details: http://www.seicane.com/car-dvd-dismantling-device-srd-400
2006 2007 2008 2009 2010-2011 Honda Civic car stereo installation instruction
1. The original car radio.

2. Pry the cover of the slot below the CD player with a lever and remove it.

3. Remove two screws inside the slot with a ninety-degree screwdriver.

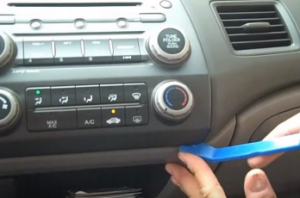
4. Pry the lower panel with a lever, loosen it with your hands at the same time, after that, remove the panel.

5. Remove one screw in the dash.

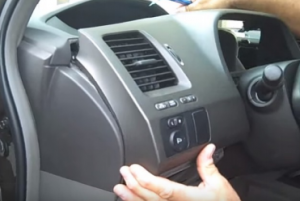
6. Remove the vent panel.

7. Unplug the connectors beneath the panel.

8. Pry the edges along the panel of the original radio, then remove it, after that, take the original car radio out of the dash.

9. Unplug the connectors at the back of the original radio.


10. Disconnect the antenna and the other connector on the other side of the original radio.


11. Check all the accessories for the new Seicane car stereo.
12. Connect the harnesses to the back of the new Seicane car stereo.
13. Connect the Seicane car stereo to your original car radio’s plugs.
14. Put the new Seicane car stereo into the dash.
15. Turn on the new Seicane car stereo and check whether the unit is working properly.
Wish the above installation instruction can do you some help. If you have any doubts, please don’t hesitate to contact your dealer, communicate with someone experienced or turn to a professional for help. Or for avoiding damage to either your car stereo or your car, you’d better go to a car stereo upgrade center to ask a technician to help you install the new car stereo.
Anyway, before installation, please make sure you’ve had an ideal car stereo. If not, I’d like to recommend an excellent 2006 2007 2008 2009 2010-2011 Honda Civic car stereo from Seicane to you. For more details, please click:
Loaded with the stable Android 6.0 operation system and a powerful 8-core 1.5 GHz RK-PX5 A53 processor, this car stereo can be regarded as the best replacement for your factory radio because of its enhanced and improved capacity and performance.
The built-in GPS navigation system of this car stereo makes it easier for you to locate where you are and find the right way to reach your desired destinations through turn-by-turn direction and voice prompts. Besides, while navigating, you can also enjoy your favorite music thanks to this unit’s dual zone function.
Besides, through the wireless Bluetooth connection between your Bluetooth-enabled mobile phone and this unit, you can dial, answer, reject and mute hands-free calls as well as listen to your favorite music streaming from your phone music playlists, which add both convenience and enjoyment to your in-car life.
Wish you enjoy your driving experience accompanied by this car stereo. Good luck to you!

Recent Comments