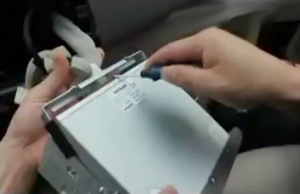
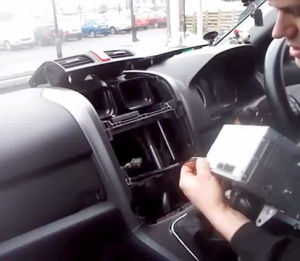
How to install a 2012 2013 Nissan SYLPHY Radio with Bluetooth WiFi GPS Navigation

Maybe many of you think it’s a several day’s work for aftermarket radio installation. When you want to replace your factory 2012 2013 Nissan SYLPHY Radio, you’ll ask someone professional of the car shop and cost 300$. In fact, it’s simple to install a new aftermarket 2012 2013 Nissan SYLPHY Radio. So, here is my experience of installation.

This is Seicane aftermarket radio after installation.

2012-2013 Nissan SYLPHY Radio after installation

2012-2013 Nissan SYLPHY Radio installation

1)First remove the dashboard panel with plastic tool.

2012-2013 Nissan SYLPHY Radio installation step 1

2)Pry the top of the original car radio panel with plastic tool.

2012-2013 Nissan SYLPHY Radio installation step 2

3)Then remove the four screws with a Phillips screwdriver.

2012-2013 Nissan SYLPHY Radio installation step 3

4)Then take out the original car radio.

2012-2013 Nissan SYLPHY Radio installation step 4

5)Pull the plug behind the radio.

2012-2013 Nissan SYLPHY Radio installation step 5

6)Socket docking with the original car directly, instead of cutting the original plug off.

2012-2013 Nissan SYLPHY Radio installation step 6

7) Remove the original car radio mounting bracket, install bracket into Seicane aftermarket radio.

8)Put the original car radio plug into Seicane aftermarket radio.

9)Firm four screws and trim panel. Finally the new Seicane radio is installed and a comprehensive test should be conducted on the new radio.


So far the radio upgrade has finished, it isn’t a several day’s work. Just a little case, isn’t it?

By the way, you should make sure whether the new aftermarket radio fits your car well before your radio installation. This is most important thing you should do first. I’d like to share a good radio of Seicane which fits 2012 2013 Nissan SYLPHY with you:

http://www.seicane.com/android-dvd-radio-gps-navigation-for-2012-2013-nissan-sylphy-with-bluetooth-wifi-mirror-link-hd-1024-600-touch-screen-obd2-dvr-backup-camera-tv-usb-sd-3g-ipod-1080p-video-s168053


This Nissan SYLPHY Radio has intelligent android 4.4.4 operation system, high quality RK3188 1.6 GHz Cortex A9 Quad-core CPU, and 8 inch HD 1024*600 multi touch screen with smooth operation high sensitivity. With 600Mhz Mali-400 MP4 GPU, it supports dual-screen display for the highest resolution of 2048*1536.

You can dial, answer, reject and mute calls without taking your hands off the steering wheel. And you can perform Google search on the road with quick search box, play online games, watch videos, download online data and check emails by connecting to any WiFi hotspot in range or 3g internet, download any applications in the android market for access to games, Skype, MSN, YouTube, twitter, E-Book, Gmail etc and so on. You can also set any picture you like as wallpaper. The button backlight is also adjustable.


Just make a different driving experience with this fantastic Nissan SYLPHY Radio in your future driving.

10 steps to install 2008 2009-2012 KIA FORTE Radio with touch screen DVR OBD2

First show you a picture of 2008-2012 original KIA FORTE Radio. If you are the owner of 2008-2012 KIA FORTE or you have the same dashboard with this car, you can follow the instructions bellow.

2008-2012 KIA FORTE dashboard

As we all know, factory KIA FORTE Radio has few functions. You can only listen to radio, play CD by it. If you want to have more useful functions. You can install a new aftermarket radio instead of it. What? You don’t know how to install a new aftermarket radio on your KIA FORTE? Don’t worry, I’ll tell you professional instructions of installation. Have a patient read at following steps, you can save some money.

Before the radio installation, you should make it sure that the new aftermarket radio fits your 2008-2012 KIA FORTE well. I’d like to share a good aftermarket radio of Seicane with you:

http://www.seicane.com/8-inch-android-4-4-4-dvd-player-gps-navigation-system-for-2008-2012-kia-forte-mt-with-radio-bluetooth-hd-1024-600-touch-screen-obd2-dvr-rearview-camera-tv-1080p-video-3g-wifi-usb-sd-steering-wheel-control-quad-core-cpu-mirror-link-s168046


This unit has intelligent android 4.4 operation system, high quality RK3188 1.6 GHz Cortex A9 Quad-core CPU, and 8 inch HD 1024*600 multi touch screen with smooth operation high sensitivity.

You can dial, answer, reject and mute calls without taking your hands off the steering wheel. And you can perform Google search on the road with quick search box, play online games, watch videos, download online data and check emails by connecting to any WiFi hotspot in range or 3g internet, download any applications in the android market for access to games, Skype, MSN, YouTube, twitter, E-Book, Gmail etc and so on.


2008-2012 KIA FORTE Radio installation

1·First remove vent panel of each side with a plastic tool.

2008-2012 KIA FORTE Radio installation step 1

2·Then remove four screws holding console in the place with a Phillips screwdriver.

2008-2012 KIA FORTE Radio installation step 2

3·Pull the whole console out of dash with medium force, watch out harnesses behind it.

2008-2012 KIA FORTE Radio installation step 3

4·Unplug the connectors.

2008-2012 KIA FORTE Radio installation step 4
2008-2012 KIA FORTE Radio installation step 5
2008-2012 KIA FORTE Radio installation step 6

5·Remove screws behind the console holding the radio in trim panel.

6·Take out the factory radio, and put the new Seicane aftermarket radio into console.

7·Fix the Seicane aftermarket radio with screws.

8·Insert the wires to the appropriate location of the upgraded head unit. If you are not sure about how to wire correctly, you may refer to the wiring diagram for details.

9·Put the whole console into dash.

10·Firm four screws and two vent panels. Finally the new Seicane radio is installed and a comprehensive test should be conducted on the new radio.


This is the whole instructions for 2008-2012 KIA FORTE Radio installation. So, can you install it by yourself? Good luck to you!

Upgrade 2006-2011 Honda CRV car GPS Navigation System installation and removal.

The direct target of this following article is to make you understand clearly about 2006-2011 Honda CRV Car GPS Navigation System installation and removal.If your car matches the car brand type so that you can refer to steps to upgrade the car head unit.As a result, advanced car radio will make your driving more joyful and safe because of the various and multifunctional performances.

Precautions:

1.Please park your car well and unplug the negative power cable to avoid any danger before start up any work.

2.Please make sure that all fastened wires are isolated with electrical tape.

3.Please make sure the ignition is off to avoid short circuit.

4.Using the improper fuse may cause damage of fire, so when replace the fuse, please consult the professional man.


2006-2011 Honda CRV car Radio Navigation System installation and removal

Pry out the speed control with a pry tool and Pull out the speed control gently, and set it side.

Unscrew two 10mm bolts under the radio,Off the trim panel with removal tool.


 pull out the panel and then put it on the top and unscrew two 10mm bolts on the radio.


Pull out the radio and Disconnect the harnesses behind the radio.

Remove the screws that secure the hazard warning switch to the radio, then remove the switch.

6.Install the hazard warining switch and firm the screws.

Make antennas and cables connected step by step as installation instructions show carefully.

Connect the new Seicane Honda CRV head unit to your dashboard, you should check your connections, the new unit’s position.

Check whether the unit is working without problem.

10·When the radio is working properly, push the radio into place, firm four removed bolts that are put aside, then make panel back on your new unit.


Hope you have no doubt with the installation and removal for 2006-2011 Honda CRV car stereo. If you still have something confused, please feel free to contact a dealer or professional for support. Surely you can check the link below for more information:

https://www.seicane.com/2-din-radio-android-gps-dvd-player-for-2006-2007-2008-2011-honda-crv-navigation-system-support-usb-sd-bluetooth-3g-wifi-aux-rearview-camera-mirror-link-obd2-dvr-s32789f

This 2006-2015 Honda CRV Car DVD Player comes with the latest Android Radio, RAM 4GB \ ROM 64GB \ CPU 8-core \ Built-in Carplay \ 2.5D IPS Screen, Support RDS, SWC, XM radio APP,support Split Screen Display etc. It replaces your factory radio with android based system of great utility and extendability. And your original factory steering wheel controls will work properly. With this car radio you will offer you a various ways to have a wonderful time during the driving and make your trips safer.


Some questions you may concern about finding a fitting unit

To find a right headunit for your car to upgrade the navigation system or DVD radio, some questions may concern you.Please refer to the following as a reference.

1.Which unit would fit my car best? Or would this unit fit my car? Or how would I know if this unit can fit my car?

First of all, you must know the year and model of your car. Please enter the year and model as the key words in the searching box on our website. Related searches will occur, then please go ahead to click them. If there are several searching results,please check them one by one. The product webpage will give you detailed information as a reference to know more about the unit and you can pick a favorite and fitting one.

To make sure if one unit can fit your car,you’d better compare your dashboard with the original radio pictures listed on the product webpage.If your dashboard picture is similar to the original radio picture listed in the unit’s product description page,then that unit will fit your car.

If you are still uncertain about this,please send us dashboard photo of your car at [email protected], and then we can check whether it will fit your car.
2. Are there some installation instructions?

Yes, we have installation instructions for some units,please contact us to make confirmation if you need. You can chat with us online or send email to [email protected].

For the units without installation instructions, we are very sorry for that and please arrange a professional to install it.
If you have any questions about installation,please send us photos about your original car’s plugs.Maybe we can make a wiring diagram for your car.

Does your car have optic fiber? If your car have optic fiber,then we can send you one wiring diagram.

And this is a link about installation,hope it can help you: http://www.seicane.com/mercedes-benz-e-class-w211-2002-2008-car-stereo-head-unit-upgrade-buying-guide-installation/#tab3
3. My car has optic fiber amplifier,will it still work if I install your unit?

If your car is Benz ML/GL/R CLASS W164 W251 or Prosche Cayenne /911(2005-2011),we have the optic fiber decoder as an option, you can order one to make your optic fiber amplifier work with our unit.

If you have other car and your car has optic fiber amplifier, you will need to run a 6 meter long cable to bypass your original car’s optic fiber amplifier during the installation.

The 6 meter long cable is for cars with optic fiber amplifer.The role of it is to transmit sound from our unit to your original car’s four speakers.If your car has optic fiber amplifier, then you need to connect this cable. And your original car’s optic fiber amplifier will not work after installation.

Even though your car’s optic fiber amplifier does not work, the sound quality of the unit is still very good. It has built-in amplifier and this amplifier can drive four speakers of your original car (FL, FR, RL, RR).If you need all the speakers work, you can add an amplifier. This way of installation is relatively complicated and not totally plug-and-play.

If you need to check if your car has optic fiber amplifier, you may need to remove your oriignal car’s radio andsend us pictures of the plugs. You can also consult at the place where you’ve bought the car.
4. My car has GPS function, can it work with your unit?

Some units don’t fit to cars with navigation at present. If your car comes with GPS function, you can send email to us at [email protected] to confirm whether that unit can work with your GPS function. If not, we can help to find a right unit to work with your GPS.
5. Does your unit support satellite radio?

Our radios do not come with an internal satellite radio tuner. This means that in order to listen to satellite radio, you need to either use an external satellite tuner and plug into the AUX cables in the rear of the radio, or use the bluetooth streaming feature from a smartphone using the free Sirius/XM app.
6. What is the warranty?

We have one year warranty for our units. All of our products are covered by a 12-month warranty, for replace and repair.
7. Can you offer a better price?
Sorry, this is the best price we can provide but we can send an SD card to you as a gift.
8. Is the shopping cost free? If not, how much is it?

Sorry, you have to pay for the shipping cost but we can send an SD card to you as a gift.
Please add this unit to cart, and choose the country you want to ship to, shipping fees will be estimated by our system automatically.
9. What kind of payment you can accept?

We do currently accept international PayPal,Western Union,Credit card,bank transfer.
10. How to pay with a credit card?

Please add this unit to cart and go to payment page. Please select the payment method paypal. Go on and select “Pay with a debit or credit card”, and then pay via your credit card. Thank you for shopping with us. The address in your paypal should be the same with you shipping address.
11.How long can I get the unit?

Generally speaking, we need about 3 days to process your order,and then it takes about 3-5 days to reach your door after shipping.

May the above can be helpful for you to select a fitting unit, if you have further questions, please feel free to contact us via online chat or send email to [email protected]. We are always trying our best to provide you with the best service. Hopefully you can have a nice shopping experience with us!Thank you!

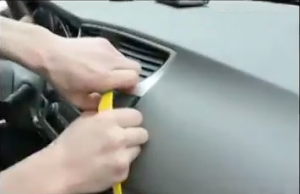
How to remove and install a 2009-2012 Mazda 3 Radio DVD player navigation system

The Mazda 3 proves that economical, fuel-efficient cars need not be dull to look at or to drive. I think that Mazda 3 is a good choice for most of us. But the original Mazda 3 Radio has only a few functions, if you want to use DVD player of navigation system. You need to remove the original radio and install a new aftermarket radio for your Mazda 3. Some of you might have no idea how to remove an install it. Don’t worry, I’d like to share my experience of remove an install the radio of Mazda 3.


This is a original radio of Mazda 3. Do you have the same radio in your car? If you say yes, you can follow the instructions below.

2009-2012 Mazda 3 dashboard

2009-2012 Mazda 3 Radio removal

1·Start your removal by removing the negative cable from the battery. Then return to the inside of the Mazda 3.

2·Next pry the vent panel and pull it out with medium force slowly. Then set it aside.

2009-2012 Mazda 3 Radio removal step 1

3·Now use a Phillips-head screwdriver to remove both sides screws of the radio as the picture shows.

2009-2012 Mazda 3 Radio removal step 2

4·Then pull out the original radio slowly.

2009-2012 Mazda 3 Radio removal step 3

5·Disconnect the wiring behind the original radio.

2009-2012 Mazda 3 Radio removal step 4

By the way, if you are looking for aftermarket radio for your Mazda 3. I’d like to share a good one with you:

http://www.seicane.com/8-inch-android-autoradio-stereo-gps-navigation-system-for-2009-2012-mazda-3-with-dvd-player-bluetooth-mirror-link-hd-touch-screen-obd-dvr-rear-view-camera-tv-usb-sd-3g-wifi-ipod-s168003


If you don’t know which aftermarket radio is better, this unit can be a good choice for you. It has intelligent pure android 4.4.4 operation system and 8 inch HD 1024*600 multi-touch screen.

You can perform Google search on the road with quick search box, play online games, watch videos, download online data and check emails by connecting to any WiFi hotspot in range or 3g internet, download any applications in the android market for access to games, Skype, MSN, YouTube, twitter, E-Book, Gmail etc. And it is your perfect road companion.


2009-2012 Mazda 3 Radio installation

1·Make antennas and cables connected step by step as installation instructions show, and you should be very careful when you are doing this for it will affect whole procedure.

2·Connect the new radio to your Mazda 3, you should check whether your connections are correct, the new unit is in right position, and you’d better have a tidy for the cables.

3·Check whether the unit is working without problem.

4·If everything is OK, firm removed screws that are put aside, then make trim panel back on your new unit.


The radio has been installed now, new Mazda 3 Radio is belong to you.


Upgrade your Mazda 3 Radio by yourself. Good luck to you!