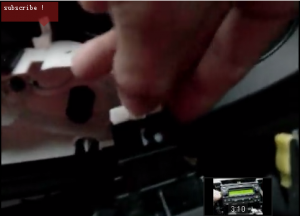
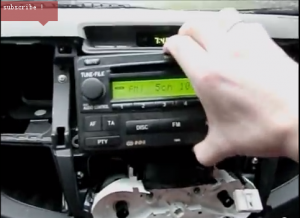
How to install 2010 Toyota Raze navigation system with radio IPod 3-zone POP

Are you familiar with this image:navigation dvd car stereo of 2010 Toyota Raze?
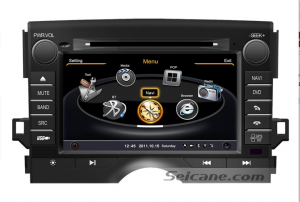
navigation dvd car stereo of 2010 Toyota Raze

Some of you may have seen this stereo when you are shopping in the car market,you want to take one home but you have no idea how to install it in your 2010 Toyota Raze.Or in other words,you don’t know how to remove original radio first.Doesn’t matter,today I will show you 10 steps on how to install 2010 Toyota Raze navigation system with radio IPod 3-zone POP.

It’s very easy to confirm information of cars like mode,size, years and so on,but if it’s about the detailed steps to mount a car audio system?Maybe very few people knows.

Before you upgrade your car’s stereo audio,you should ensure that the instructions for it are exactly right.And the general process can be like this:

1.Choose one unit that can be installed in your car.

2.Trying to collect precise installation guide from the Internet,TV,magazine or other media routes.

3.Chatting with workers who serves in this market and tell them what your doubt is about is one of ways that is normally used.And you may visit this website to get what you want by scanning and talking with them:http:http://www.seicane.com/8-inch-2010-toyota-raze-autoradio-gps-head-unit-3g-wifi-cd-dvd-player-dvr-bluetooth-music-tv-tuner-aux-steering-wheel-control-ipod-iphone-backup-camera-mp3-pop-c084.

If you hope to make your Toyota Raze cd player removal and dvd player installation more precise and safer, here are some advices about the installation and usage of the unit:

Precautions about the installation:

Please use your finger or touch screen pen to gently operate unit, do not use other objects include your fingers, if not it will cause damage to the screen;

Don’t do self-service,maintenance or install the unit please when you have no experience or knowledge about it,in case of the power is on.

2010 Toyota Raze factory stereo removal:

1.Before you start installation, remove negative terminal of battery

2.Unclip side panels from lower center console(beside shifter) with a panel removal tool

Unclip side panels from lower center console(beside shifter) with a panel removal tool


3.Use  remove the plastic piece that’s contains the shifter override with a small flat blade screwdriver

Use  remove the plastic piece that's contains the shifter override with a small flat blade screwdriver
Use remove the plastic piece that’s contains the shifter override with a small flat blade screwdriver


4.Insert key into override move in gear and get out shift benzal piece

Insert key into override move in gear and get out shift benzal piece


4.Remove 2 screws as the picture show

Remove 2 screws as the picture show


5.Take the below small dashboard out

Take the below small dashboard out


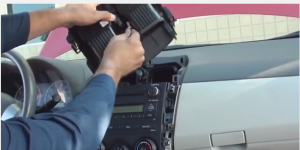
6.Use a panel removal tool to unclip side panels from radio

Use a panel removal tool to unclip side panels from radio


7.Take out air vent and pull out hazard switch

Take out air vent
Take out air vent


pull out hazard switch


8.This is 10mm hex head screws from stereo

This is 10mm hex head screws from stereo


9.Unclip connectors of the stereo and remove

Unclip connectors of the stereo and remove


2010 Toyota Raze aftermarket navigation installation:

10.Make connections on all the cables correctly and install the dvd navigation head unit in your car

Connecting all cables of Toyota Raze navigation installation is a work that you should be more careful because it is more complex than other steps itself and there are much fine wires.If you are not very sure about it,I suggest you to do it according to corresponding instructions,check it once again after you have finished it.Or you can ask someone to help you,who is professional at it and can make your work more perfect.

And I wrote another article which is about Toyota Verso radio

,hope you can get something that benefits you from it.


Easy installation steps for 2012 Toyota Hilux GPS dvd support BT 1080P Ipod

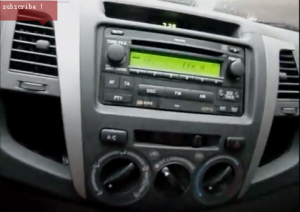
First of all,let’s have a look at following picture: car stereo autoradio after installation,GPS dvd sat nav system of 2012 Toyota Hilux.

Car stereo autoradio after installation,GPS dvd sat nav system of 2012 Toyota Hilux
Car stereo autoradio after installation,GPS dvd sat nav system of 2012 Toyota Hilu


If you would like to upgrade your car’s audio system,go to car market and willing to choose a fashionable Toyota Hilux GPS  dvd.Please mind that the stereo must be suitable for your car,so you need to look carefully the radio’s trim panel to see if it’s same to your original one’s.


Next,you need to have a check for your car and make sure that you have turned off all car series and remember to unplug negative power cable before installation.


After doing all these,you need to learn how to do it if you are going to achieve it yourself.Don’t worry,it doesn’t need much skills but need you to be careful and I will show you easy installation steps for 2012 Toyota Hilux GPS dvd support BT 1080P Ipod.


2012 Toyota Hilux original head unit removal:

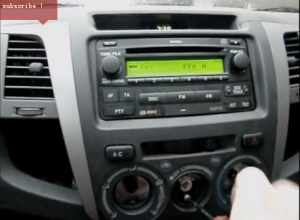
1.Turn off power switches as the picture show and remove three small covers in lower place

Turn off power switches
remove three small covers in lower place

2.Take out the middle screw

Take out the middle screw


3.Push in buttons a little  on left and right side

Push in buttons a little  on left and right side
Push in buttons a little on left and right side


4.Take trim panel off the radio

Take trim panel off the radio


5.Disconnect cable behind it and take out two screws with a screwdriver

Disconnect cable behind it
       Disconnect cable behind it 
take out two screws with a screwdriver
take out two screws with a screwdriv 


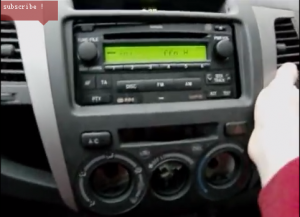
6.The cd radio after removal as the picture show

the dashboard after removal as the picture show


7.Release four screws that lay on two sides,remove them

Release four screws that lay on two sides,remove them


8.Take out  the CD player after four long screws have been removed

Take out  the CD player after four long screws have been removed
Take out the CD player after four long screws have been removed


9.Disconnect wires behind the CD player

Disconnect wires behind the CD player


2012 Toyota Hilux GPS dvd installation:

When you have finished removing factory CD radio successfully with the help of removal guide,you can make a comparison between above removed one with yours,in order to make sure that you have done right disconnection.

As for the next work that is to install a new radio,you can read the installation instructions which is within your bought radio.There should be detailed introduction on how to make connection on all cables.

And I advise you to ask someone who is more professional to do it,after all it’s a little complex and matters much.If you feel confused or feel difficulty dealing with something,you can visit a website to have a detailed talk with workers there,for example: http://www.seicane.com/all-in-one-2012-toyota-hilux-dvd-gps-audio-system-radio-rds-tv-tuner-bluetooth-music-3g-wifi-ipod-1080p-auto-a-v-in-out-dvr-aux-pop-backup-camera-usb-sd-c143.


In fact car stereo upgrade is almost same in a large proportion,and it’s also normal to find some difference,you will solve it well only if you have made adequate preparations before you start up.

Some Precautions after installation:

1.If you want to clean the touch screen,please use a piece of clean and dry cloth and gently wipe it,do not use any liquid to wash it

2.Please do not stare at the machine especially when you are driving on a complex road,the video can bring you entertainments but not attentions or energy,so you’d better enjoy it only when you are free

3.Please pay more attention to the GPS dvd when your car is driving on a rainy day,for moisture may gather on it and cause damage to the system


Update a removal experience about 2007-2017 TOYOTA LAND CRUISER Car GPS Navigation System

Update a removal experience about 2007-2017 TOYOTA LAND CRUISER Car GPS Navigation System 

Generally if people do not satisfy their car radios,mostly because the car factory head unit is lack of functions they need. To purchase a new advanced and modern car radio with expected foundations to replace the original one is kind of prior selection. That is the reason to write down the following article. As well you can ask a dealer or professional guy if you can not remove successfully by following the steps below. Good luck.

First of all, please note:

  1. Please park the car in safe area and remove the negative cable on the vehicle battery before the removal
  2. A lever and a screwdriver need to be prepared before the installation.

2007-2017 TOYOTA LAND CRUISER Car Stereo Removal

1.Take out the two blots that distributed on both sides of handbrake

2.Remove the screws with screws driver.

3.Take the left & right loosed dashboard out after the bolts are removed

4.Disconnect the cables on back between the left & right loosed dashboard

5.Take the screw out with removing tool.

6.Get out the screws which holding the CD Player on the dash.

7.Pull CD player off the unit

8.Unplug the cables behind carefully. (Wiring Diagram as reference)

Wish 2007-2017 TOYOTA LAND CRUISER car DVD Player installation and removal article is just what you need now.You can make your car more attractive with the touchable and multifunctional car radio for 2007-2017 TOYOTA LAND CRUISER from Seicane. If you have not shopped any good, please click the link below to get more information. Perhaps it would fit your car.

https://www.seicane.com/oem-android-dvd-player-for-2004-2016-toyota-land-cruiser-lc200-radio-replacement-with-touch-screen-gps-car-stereo-bluetooth-music-mirror-link-obd2-3g-wifi-video-backup-camera-s169009


This 2007-2017 Toyota LAND CRUISER Car GPS Navigation  comes with the latest Android Radio, RAM 4GB \ ROM 64GB \ CPU 8-core \ Built-in Carplay \ 2.5D IPS Screen, Support RDS, SWC, XM radio APP etc. You can still keep the steering wheel control working after the installation of this fantastic stereo. Hopefully you shall a awesome experience with the new unit.