How to easily upgrade a 1996-2003 BMW 5 Series E39 bluetooth dvd navigation system support 3G WiFi Radio Mirror Link

With the most up-to-date car stereo in your car, you can enjoy much fun and enjoyment on all trips. But how do I upgrade the old factory radio? Do I have to go to the stereo upgrade center or professionals to upgrade the radio? Absolutely not. In fact, you just need a step-by-step installation guide to learn the installation process. In here, I’d like to introduce a installation guide for a 1996-2003 BMW 5 Series E39 bluetooth dvd navigation system from Seicane to you. Wish you can get some help from that.

1996-2003 BMW 5 Series E39 bluetooth dvd navigation system after installation


Before and during installation, you should notice:

1.Before connecting, please make sure the ignition is off to avoid short circuit.

2.Ensure connect the yellow and red power cable at last.

3.Ensure that all loose wires are isolated with electrical tape

4.Ensure don’t tangle the wire when tighten the moving parts(Such as seat rails).

5.Ensure that all ground is connected to the same place.

6.Using the improper fuse may cause damage of fire, so when replace the fuse, please consult the professional.

7.For your convenience, here’s the recommended tools for removal and installation from Seicane, please check for more details: http://www.seicane.com/car-dvd-dismantling-device-srd-400


1996-2003 BMW 5 Series E39 bluetooth dvd navigation system installation guide

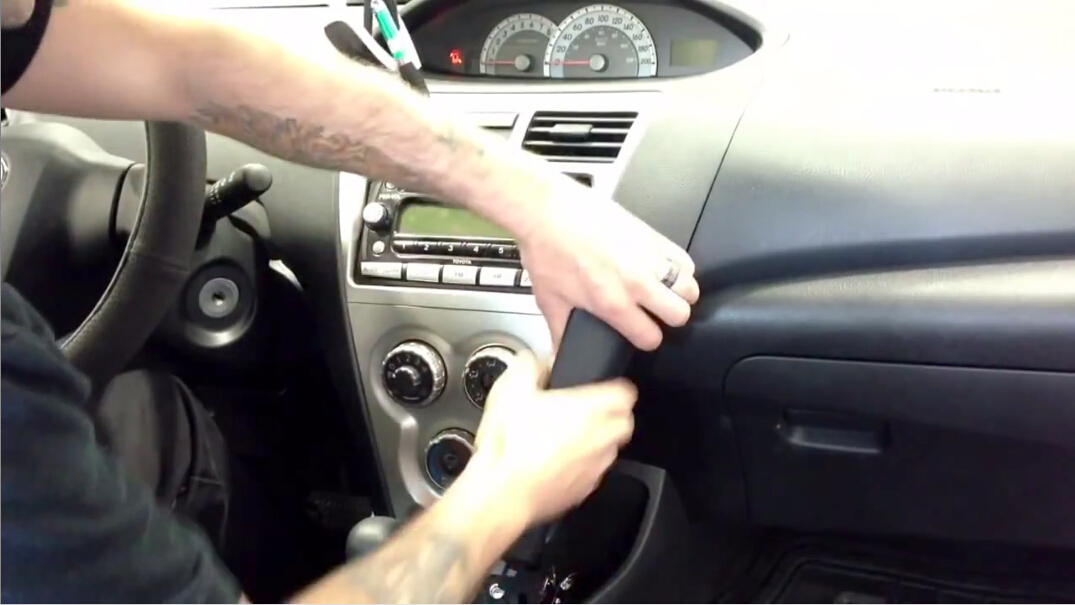
1. Use a plastic trim tool to remove trim strip.

Use a plastic trim tool to remove trim strip

2. Remove screws marked by red arrows.

Remove screws marked by red arrows

3. Take out original DVD player of the car.

Take out original DVD player of the car

4. Pull out original power plug of the car.

Pull out original power plug of the car

5. Connect the power cables as the picture shows.

Connect the power cables as the picture shows

6. Remove screws in the spare tire in the trunk.

Remove screws in the spare tire in the trunk

7. Take out the spare tire.

Take out the spare tire

8. Remove four screws marked with red arrows.

Remove four screws marked with red arrows

9. Remove screws in triangle crutch.

Remove screws in triangle crutch

10. Take out triangle crutch.

Take out triangle crutch

11. Connect original plug of the car with power plug of DVD GPS.

Connect original plug of the car with power plug of DVD GPS

12. Check all the accessories for the new Seicane head unit.

Check all the accessories for the new Seicane head unit

13. Connect the harnesses to the back of the new Seicane head unit.

Connect the harnesses to the back of the new Seicane head unit

14. Connect the Seicane head unit to your original car radio ‘s plugs.

15. Turn on the new Seicane head unit to have a careful check if everything works well. If it doesn’t, please check whether all the cables are connected correctly.

16. Put the new Seicane head unit into the dash and install the four screws.

17. Install the trim panel into its original place.


All above is the detailed installation guide for a 1996-2003 BMW 5 Series E39 bluetooth dvd navigation system. If you don’t have any experience of installation or any problem with this guide, you can go to the dealer ask for help. Or arrange the professional to install it directly. In addition, you have to find the suitable car stereo for your car at first. Do you have the suitable car stereo? If you don’t have one, this multifunctional 1996-2003 BMW 5 Series E39 bluetooth dvd navigation system from Seicane is one of your best choice. You can click this link to check it:

http://www.seicane.com/seicane-s12753-android-sat-nav-stereo-for-1996-2003-bmw-5-series-e39-520i-523i-525i-m5-with-hd-1024-600-multi-touch-screen-3g-wifi-dvd-bluetooth-radio-mirror-link-obd2

With the most up-to-date intelligent pure android 5.1.1 operation system, you can count on its latest built-in 3D GPS and voice prompts to enter the correct direction of the destination. A variety of additional entertainment features can also bring you a wonderful and relaxing journey that you never ever had before. Wish you like it and enjoy the good time with it from now!

9 easy steps to install a 2002-2008 Mercedes Benz E Class W211 Sat Navi radio stereo with 3G WiFi DVR Tuner

2002-2008 Mercedes Benz E Class W211 Sat Navi radio stereo after installation

Are you looking for a detailed installation guide in order to install the new car head unit in your car? If you are looking for the installation guide, this article is worth for you to read it. In the following, I’d like to share a detailed installation guide for a 2002-2008 Mercedes Benz E Class W211 Sat Navi radio stereo from Seicane with you. Here is the picture after the installation.

2002-2008 Mercedes Benz E Class W211 Sat Navi radio stereo after installation

Before and during installation, you should notice:

1.Before connecting, please make sure the ignition is off to avoid short circuit.

2.Ensure connect the yellow and red power cable at last.

3.Ensure that all loose wires are isolated with electrical tape

4.Ensure don’t tangle the wire when tighten the moving parts(Such as seat rails).

5.Ensure that all ground is connected to the same place.

6.Using the improper fuse may cause damage of fire, so when replace the fuse, please consult the professional.

7.For your convenience, here’s the recommended tools for removal and installation from Seicane, please check for more details: http://www.seicane.com/car-dvd-dismantling-device-srd-400


2002-2008 Mercedes Benz E Class W211 Sat Navi radio stereo installation guide

1. Release the panel from the gearlever by your hands.

Release the panel from the gearlever by your hands

2. Remove the cigarette lighter and put it aside.

Remove the cigarette lighter and put it aside

3. Remove two screws under the CD changer and take out the CD changer.

3-1.Remove two screws under the CD changer and take out the CD changer
3-2
3-2

4. Remove the two screws under the original radio.

Remove the two screws under the original radio

5. Pull out the original radio and disconnect the wires.

5-1.Pull out the original radio and disconnect the wires
5-2
5-2

6. Check all the accessories for the new Seicane head unit.

Check all the accessories for the new Seicane head unit

7. Connect the harnesses to the back of the new Seicane head unit.

Connect the harnesses to the back of the new Seicane head unit

8. Put the new Seicane unit into the dash.

9. Turn on the new Seicane unit and have a comprehensive check if it works well. If not, please check whether all the cables are connected correctly.


All above is the detailed installation guide for a 2002-2008 Mercedes Benz E Class W211 Sat Navi radio stereo and wish you can learn something from it. If you don’t have any experience of installation, it suggests you to the dealer or professional ask for help. Besides, it’s very important for you to find the suitable car head unit at first. If you don’t have one yet, I’d like to introduce a newest 2002-2008 Mercedes Benz E Class W211 Sat Navi radio stereo from Seicane to you and wish you like it.

http://www.seicane.com/seicane-s127501-android-car-stereo-dvd-gps-system-for-2002-2008-mercedes-benz-e-class-w211-e200-e220-e230-e240-with-bluetooth-radio-tuner-3g-wifi-mirror-link-obd2-rearview-camera-dvr-s127501

The 2002-2008 Mercedes Benz E Class W211 Sat Navi radio stereo of high quality with a 7 Inch touch screen, GPS and Bluetooth connectivity is a great discount priced in-car entertainment system that offers all the latest features, including 3D navigation, Bluetooth, CD DVD player, radio tuner, office tools, file management, etc. Have a good time with it from now!

How to skillfully replace a 2003-2010 Toyota Avanza stereo gps audio system with DVD player TV USB

2003-2010 Toyota Avanza stereo gps audio system after installation

What will you do when you are stuck in a traffic jam? Do you want to listen your favorite music and surf internet during this time? Now, you can enjoy all of this and best experience from the most up-to-date car stereo. In here, I’d like to introduce a detailed installation guide for a 2003-2010 Toyota Avanza stereo gps audio system from Seicane and you can take this as reference.

2003-2010 Toyota Avanza stereo gps audio system after installation

Some tips before the installation:

1.Please disconnect the power before the installation.

2.Please prepare a lever and a screwdriver before the removal and the installation.

3.Please keep all the separate parts from the car. Please take great care of the dashboard to avoid scratching it during its detachment and installation. Please keep handy any parts from the car and make use of all the original screws from the car as much as possible. so each related part of the unit can be fixed securely.

4.For your convenience, here’s the recommended tools for removal and installation from Seicane, please check for more details: http://www.seicane.com/car-dvd-dismantling-device-srd-400


2003-2010 Toyota Avanza stereo gps audio system installation guide

1. Remove two trim panels at each side of the center console and set it aside.

Remove two trim panels at each side of the center console and set it aside

2. Remove the top panel and set it aside.

Remove the top panel and set it aside

3. Remove 4 screws holding the unit with a Phillips screwdriver.

Remove 4 screws holding the unit with a Phillips screwdriver

4. Gently take out the panel on the radio interface.

Gently take out the panel on the radio interface

5. Take out the radio and disconnect cables at back of it.

Take out the radio and disconnect cables at back of it

6. Check all the accessories for the new Seicane head unit.

7. Connect the harnesses to the back of the new Seicane head unit.

8. Connect the Seicane head unit to your original car radio ‘s plugs.

9. Put the new Seicane head unit into the dash.

10. Turn on the new Seicane head unit and have a comprehensive check if it works well.

11. Install 4 screws back to their original position.

12. Install the trim panel back to its original place.


After reading this installation guide for a 2003-2010 Toyota Avanza stereo gps audio system, wish you can learn something from that and try to install it by yourself. If you find the picture shown above is different from your dashboard, please rest assured that the installation guide is much same. Or you can go the dealer or professional to ask them install it directly. Moreover, you have to make sure the new car stereo can work well in your car. If you don’t have one yet, I’d like to share a wonderful 2003-2010 Toyota Avanza stereo gps audio system from Seicane with you.

http://www.seicane.com/android-car-stereo-bluetooth-gps-navigation-system-for-2003-2010-toyota-avanza-with-dvd-player-mirror-link-hd-touch-screen-obd-dvr-rearview-camera-tv-usb-sd-radio-3g-wifi-ipod-s166229

This most up-to-date 2003-2010 Toyota Avanza stereo gps audio system is the best replacement for the factory radio. The Bluetooth technology let you wirelessly pair with your Bluetooth-enabled cell phones for hands-free calls and streaming music to have a safe and cheerful journey. Wish you like it!