As the user of BMW, perhaps you have been familiar to take good care of your car as well as your collections, However, there is one decisive point that can play an important role in your driving life, which is the new head unit itself, bringing you pretty much fun during the driving experience. Therefore, many user of BMW would choose to upgrade their receiver for the high-vehicle car by themselves not only because it can save some budget but also it doesn’t take much time to complete it. Only a few people know exactly how to install their new touch screen and the following useful Installation guide of BMW 7 Series F01 Radio with Carplay Android Auto would definitely give you help and anyone without experience can take it as good reference.

Before installation, you should pay attention to some important tips. First of all, you can disconnect the power and prepare some tools such as lever before the removal and the installation. Secondly, you should keep all the separate parts from the car and take great care of the dashboard to avoid scratching it during its detachment and installation.
Last but not least, you should keep handy any parts from the car and make use of all the original screws from the car as much as possible so that each related part of the unit can be fixed securely.
Useful Installation of Navigation System for BMW 7 Series 2009-2012
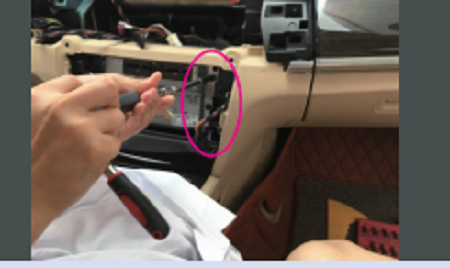
1.Lever air outlet panel from the both right and the left sides.

2.Disconnect the wiring and take off the screws on both sides.

3.Pull out the frame of OEM screen and disconnect the wiring of the OEM screen.

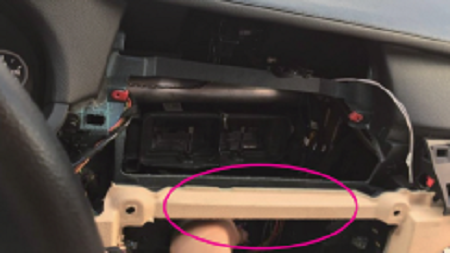
4.Take off the screws on the both sides.

5.Lever AC panel from the left and to the right.

6.Unplug the connectors on the left side and take off the connectors on the right side.

7.Take off the screws on the both sides.
8.Pull out OEM head unit and Unplug the main power cable.

9.Unplug the fiber optical connector and connect the unplugged fiber optical connector with new wiring.

10.Connect OEM male connector with new female connector.

11.Connected the wiring behind the original radio.

12.Adjust all connectors and place them right.
13.Install the CD unit and fix the screws.

14.Plug the new wires of speakers on the screen and connect LVDS connectors.

15..Install the new screen and fix the screw on the both sides.
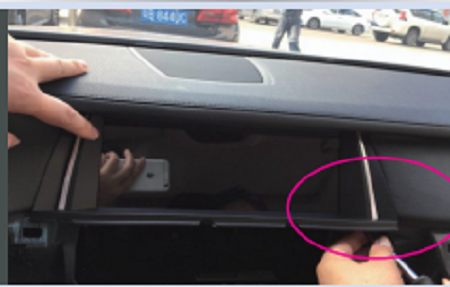
16.Connect all the cables and put the AC vent board back.

17.Fix the 2 screws and the AC panel.

Until now you should have been clear about how to replace your car audio in your BMW 7 Series and don’t forget to check the functions of your radios and see whether it can perform as the original one as well. If you have any doubt during this procedure, you should ask for a professional for help as they will give you the proper advice at once or you can go to the online service and buy it at your cost . As far as I am concerned, I would like to recommend one of the famous brand—Seicane, which has been making Android units over ten years in China, its new product of BMW 7 Series Installation can give you wonderful entertainment in your car.
There are two configurations you can opt for, one is with 4-core CPU, 2GB+32GB, 30EQ DSP; another is with 8-core CPU, 4GB+64GB, 16 EQ DSP, both are Android 10.0 system and can offer stable performance, just buy at your budget.
On the whole, don’t miss this chance if you love it and you will find more surprise than you can imagine !

Recent Comments