As you know, an ideal car stereo can provide you with great convenience and enjoyment for car owners all the way. And thanks to special wiring harness, actually the installation of a car stereo is not complicated. Therefore, with some related installation experience and a correct installation guide, you can also easily finish the whole installation by yourself. This article aims to introduce a step-by-step 2000 2001 2002 2003 2004-2011 Mercedes BENZ SLK Class SLK200 SLK280 SLK350 SLK55 car radio installation instruction from Seicane to you. You may take it as a reference if you have the same or similar dashboard.

Tips about the installation:
1.Please disconnect the power before the installation.
2.Please prepare a lever and a screwdriver before the removal and the installation.
3.Please keep all the separate parts from the car. Please take great care of the dashboard to avoid scratching it during its detachment and installation. Please keep handy any parts from the car and make use of all the original screws from the car as much as possible. so each related part of the unit can be fixed securely.
4.For your convenience, here’s the recommended tools for removal and installation from Seicane, please check for more details: http://www.seicane.com/car-dvd-dismantling-device-srd-400
2000 2001 2002 2003 2004-2011 Mercedes BENZ SLK Class SLK200 SLK280 SLK350 SLK55 car radio installation instruction
1. The original car radio.

2. Push inwards adn remove one T20 screw with a screwdriver.


3. Remove the cover around the cigarette lighter and then unscrew another T20 screw.


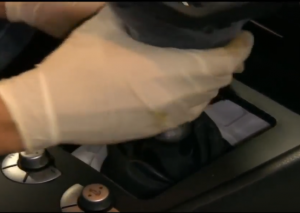
4. Lift up the shift boot, unplug the connectors at the back and put it aside.


5. Pull out the cigarette lighter and remove the connectors behind.


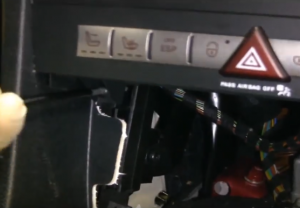
6. Remove the AC control and disconnect connectors.


7. Unscrew a set of screws, remove and unplug the connectors at the back.


8. Remove bottom screws that are holding the radio on the dashboard.

9. Unscrew top screws and remove the cover.


10. Remove another two screws that hold the radio.

11. Remove the original car radio and then disconnect the connectors behind.

12. Check all the accessories for the new Seicane car radio.

13. Connect the harnesses to the back of the new Seicane car radio.

14. Connect the Seicane car radio to your original stereo’s plugs.
15. Turn on the new Seicane car radio to have a careful check if everything works well. If it doesn’t, please check whether all the cables are connected correctly.
16. Put the new Seicane car radio into the dash.
17. Put everything into their original place. All the installation is done.
Wish the above installation steps can be helpful for you. Whether you have any doubts about your car radio or your car, you can seek help from your dealer, someone experienced or a professional. To avoid making damage to either your car radio or your car, you can straightly arrange a professional technician to help install the new car radio. While for selecting an ideal car radio, if you have no ideas, I’d like to share an amazing 2000 2001 2002 2003 2004-2011 Mercedes BENZ SLK Class SLK200 SLK280 SLK350 SLK55 car radio from Seicane with you.
This car radio’s operation system has been upgraded to the advanced Android 6.0 version and it is featured with a powerful 8-core 1.5 GHz RK-PX5 A53 processor. Besides, it comes with a lot of practical and entertainment features to meet your different needs in your car, so it can be regarded as the best replacement for your factory radio.
With this car radio installed in your car, you must be surprised by comprehensive features, including 3D GPS navigation system, DVD player, FM/AM radio tuner, Bluetooth hands-free calls, Bluetooth streaming music, AUX, file management, steering wheel control, USB/SD card connection, etc.
By making full use of this unit’s 3DGPS function, you can get a lot of help. Under the assistance of the worldwide real-time GPS navigation system, you can easily and quickly know your current locations and accurately guide to your desired destinations according to turn-by-turn directions and voice prompts. Additionally, you can also freely enjoy your favorite music while navigating thanks to this car radio’s dual zone function.
Wish you enjoy your driving accompanied by this all-in-one car radio. Good luck!

Recent Comments