What will you do when you are stuck in a traffic jam? Do you want to listen your favorite music and surf internet during this time? Now, you can enjoy all of this and best experience from the most up-to-date car stereo. In here, I’d like to introduce a detailed installation guide for a 2003-2010 Toyota Avanza stereo gps audio system from Seicane and you can take this as reference.

Some tips before the installation:
1.Please disconnect the power before the installation.
2.Please prepare a lever and a screwdriver before the removal and the installation.
3.Please keep all the separate parts from the car. Please take great care of the dashboard to avoid scratching it during its detachment and installation. Please keep handy any parts from the car and make use of all the original screws from the car as much as possible. so each related part of the unit can be fixed securely.
4.For your convenience, here’s the recommended tools for removal and installation from Seicane, please check for more details: http://www.seicane.com/car-dvd-dismantling-device-srd-400
2003-2010 Toyota Avanza stereo gps audio system installation guide
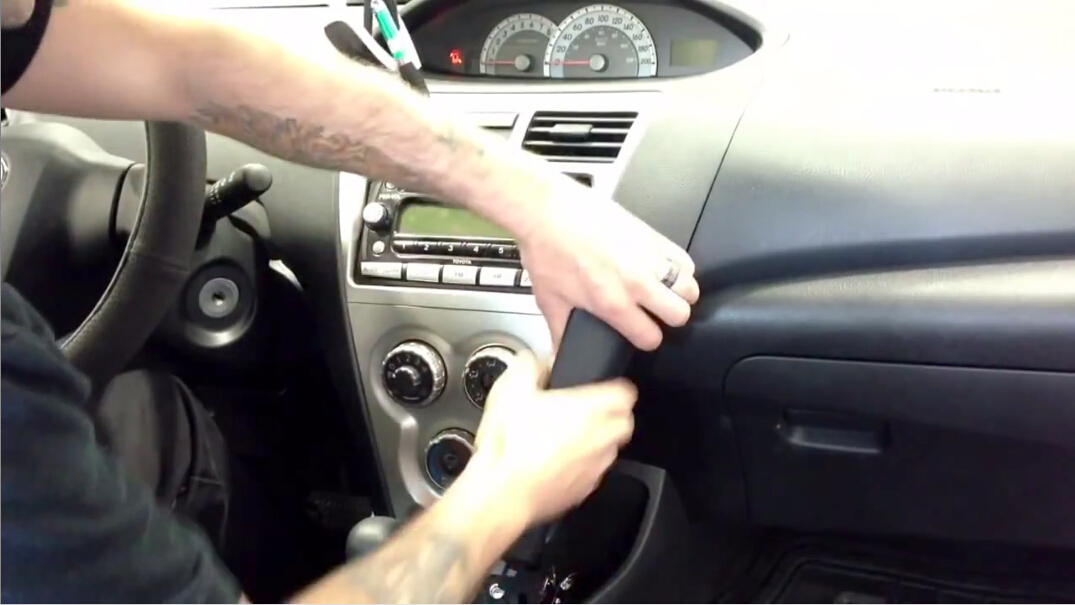
1. Remove two trim panels at each side of the center console and set it aside.
2. Remove the top panel and set it aside.

3. Remove 4 screws holding the unit with a Phillips screwdriver.

4. Gently take out the panel on the radio interface.

5. Take out the radio and disconnect cables at back of it.

6. Check all the accessories for the new Seicane head unit.
7. Connect the harnesses to the back of the new Seicane head unit.
8. Connect the Seicane head unit to your original car radio ‘s plugs.
9. Put the new Seicane head unit into the dash.
10. Turn on the new Seicane head unit and have a comprehensive check if it works well.
11. Install 4 screws back to their original position.
12. Install the trim panel back to its original place.
After reading this installation guide for a 2003-2010 Toyota Avanza stereo gps audio system, wish you can learn something from that and try to install it by yourself. If you find the picture shown above is different from your dashboard, please rest assured that the installation guide is much same. Or you can go the dealer or professional to ask them install it directly. Moreover, you have to make sure the new car stereo can work well in your car. If you don’t have one yet, I’d like to share a wonderful 2003-2010 Toyota Avanza stereo gps audio system from Seicane with you.
This most up-to-date 2003-2010 Toyota Avanza stereo gps audio system is the best replacement for the factory radio. The Bluetooth technology let you wirelessly pair with your Bluetooth-enabled cell phones for hands-free calls and streaming music to have a safe and cheerful journey. Wish you like it!